
Preface
In many situations when photographing wildlife, whether your subject is large mammals or waterfowl, it is often beneficial to utilize a blind, or “hide” of some sort, a place to better conceal yourself, your movements, and your gear. If you plan on staying put in one location for an extended period, then this may be an option to consider, and another piece of gear to add to the tool bag.
Whether you use an elaborate blind or simply wear camouflage clothing, once you learn the importance of blending into the background, you’ll find that your ability to get close to wildlife will improve enormously. But you must be willing to wait. Remember, patience is the greatest virtue and the supreme skill in wildlife photography.
What is a photography blind?
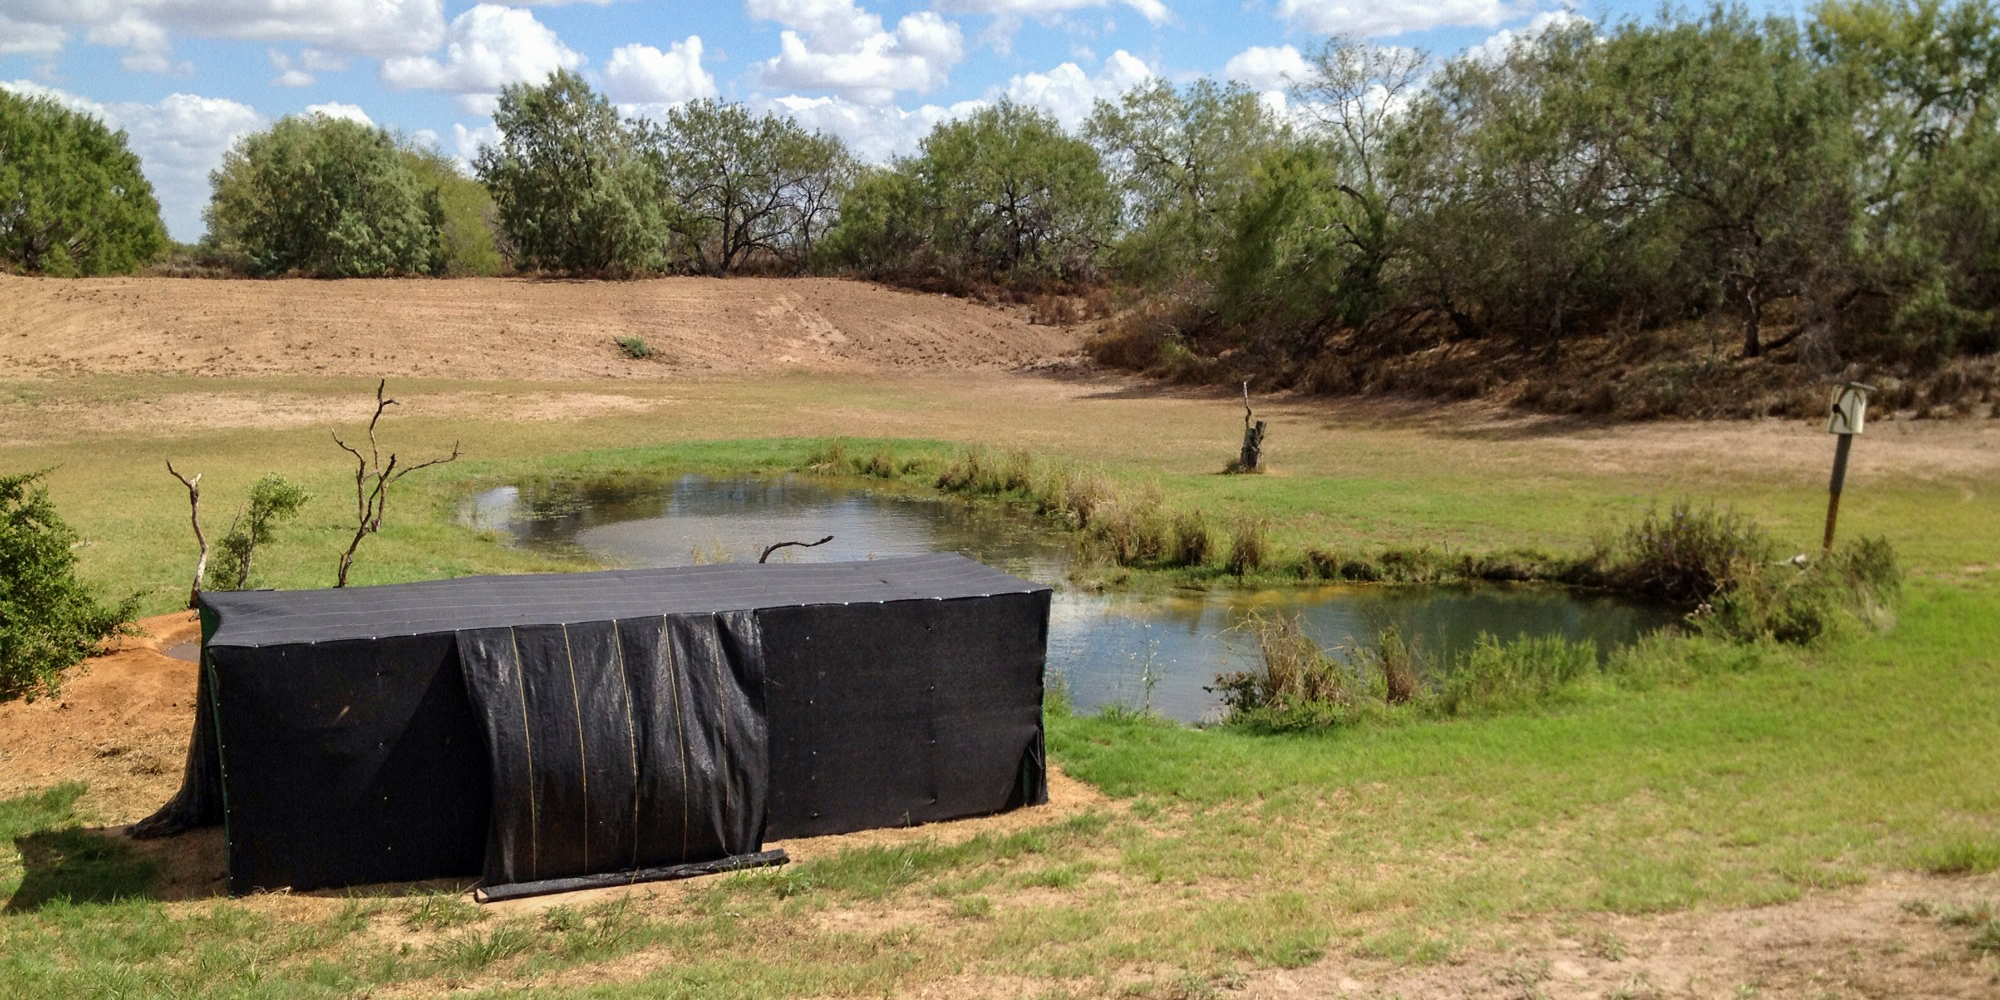
Used by both hunters and photographers, a blind is anything that provides concealment when photographing wildlife. A photography blind can be any static form of concealment which the photographer will use to hide from their subject. Meaning that once you are in location the photographic hide won’t move during a photography session. But usually it will be some sort of physical barrier between the photographer and the subject. A blind can be anything from actual brush and foliage from the surrounding area, a couple of logs that have fallen in a convenient location, to a prefabricated, portable camouflage tent, or a permanent structure.
Typically, they are placed in locations where animals visit frequently. They allow you to photograph wildlife in its natural state, without its behavior being altered by human presence – feeding, courting, caring for young, interacting with other, etc. Typical places to locate a blind are near a watering hole, food source, den, lodge, nesting site, baited area, backyard bird feeder, etc.
When talking about photography blinds, we may often think of some form of structure that we build. This isn’t always the case though. Blinds need not be fancy or perfectly match the surrounding as long as their shape is somewhat disguised by the pattern of the fabric or materials used in construction.
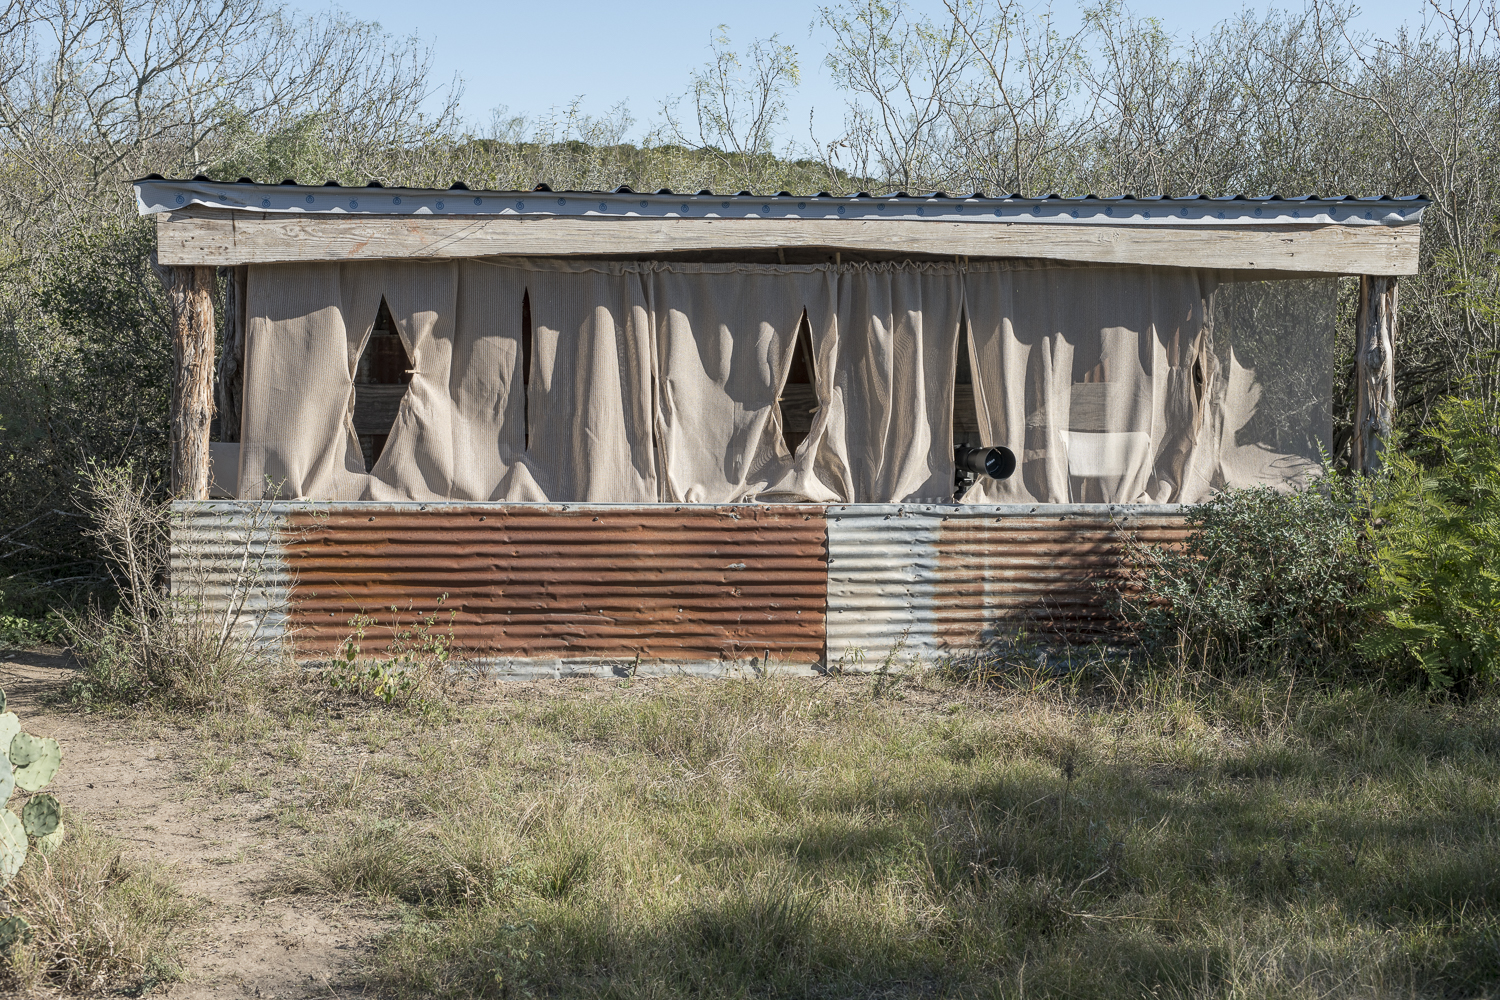
Traditionally these were a solid “shelter” like building, like you would see at a birding site. The problem with these types of structures is that they can’t be moved and unless well-placed, provide little benefit to the nature photographer. One exception to this would be if the photographic hide was constructed to provide protection from dangerous wildlife. You usually find these structures at public reserves put aside for watching birds by local government agencies.

Why is a blind necessary?
A photography blind provides a form of camouflage — a disguise or concealment — often by patterns of paint, netting or leaves used to blend in with the surroundings. There are four types of camouflage: concealing coloration, disruptive coloration, disguise and mimicry. Camouflage clothing attempts conceal and disrupt, depending upon the style.
In my early days as a wildlife photographer, the first thing I did was to buy some camouflage clothing—actually, a set of fatigues I bought at a military surplus store. At that time, I thought they were great, tough, comfortable (too big), and with roomy cargo pockets on the pants to hold film, lens caps, and other gear. The only problem was that the patterned blotches of green, brown, and black camouflage really didn’t match the colors of with the woods where I was photographing. Camouflage is a relative term — now I will select clothing that matches the area where I’m taking pictures photographing (dark greens and browns for woods; tans for the dry southwest and scrub; white for snow).
Still, camouflage won’t do you any good if your actions are conspicuous. If you stand around in the open, if you’re noisy, and if your movements are too broad and quick, you won’t get close to many wild subjects. Instead, try backing into some dense foliage, then sit down and relax. Stay as motionless as you can and let the birds come to you. I once fell asleep sitting against a tree trunk while deer hunting to find several deer browsing within fifteen yards when I awoke.
If you have a light complexion, sunlight reflecting off your skin can be a problem, advertising your presence like a beacon to passing animals. Some people smear sludge-colored face paint or even dirt on their faces to minimize this problem. I’ve never gone that far, but I do sometimes wear a camouflage head net, which both hides my face and keeps mosquitoes away.
Shiny tripods also sometimes alert wildlife. Neutral gray or black tripods are less noticeable than chrome-finished tripods. If your tripod is too bright, you can wrap camouflage tape around the top section of each leg. Hunters use this tape on their shotgun barrels, and it’s available at most sporting goods stores. Some photographers do this for lens barrels as well. Special camouflaged lens coverings are commercially available to fit specific lenses. Personally, I think that is in access.
The purpose of a photography blind is not to hide you from your subject. A photography blind is to hide your movements and to break up the general shape of the human form and your equipment. Think of it this way, birds and other wildlife worldwide are hunted by humans and associate the human form with being killed. Now, here is a nature photographer with his telephoto lens; What does the shape of his or her equipment look like? A hunter with a big gun!
A photography blind is just another tool available to the nature photographer.
Blinds do have a benefit, particularly if you are trying to photograph birds or wary wildlife but they are not a substitute for good field craft and photographic skills. I use photographic blinds in my work as a professional nature photographer but not as often as you might think. I mainly use them in permanent installations on photo ranches for workshops and training. I also use them in semi open ground where it would be difficult to conceal myself and equipment. I have various different styles of photography blinds for different purposes and situations. I have also constructed my own over the years on special projects.
A photography blind isn’t essential in my opinion but they do serve a purpose. If you are “focal length challenged”, if you use the blind wisely and follow my tips above, they do assist you to get closer to your subjects. It doesn’t hurt to use them when required. Remember though, they are no substitute for poor photography or field skills.
Whichever way you decide to go, keep in mind the points above and remember to protect the natural world and creatures and not cause undue stress.
Types of blinds
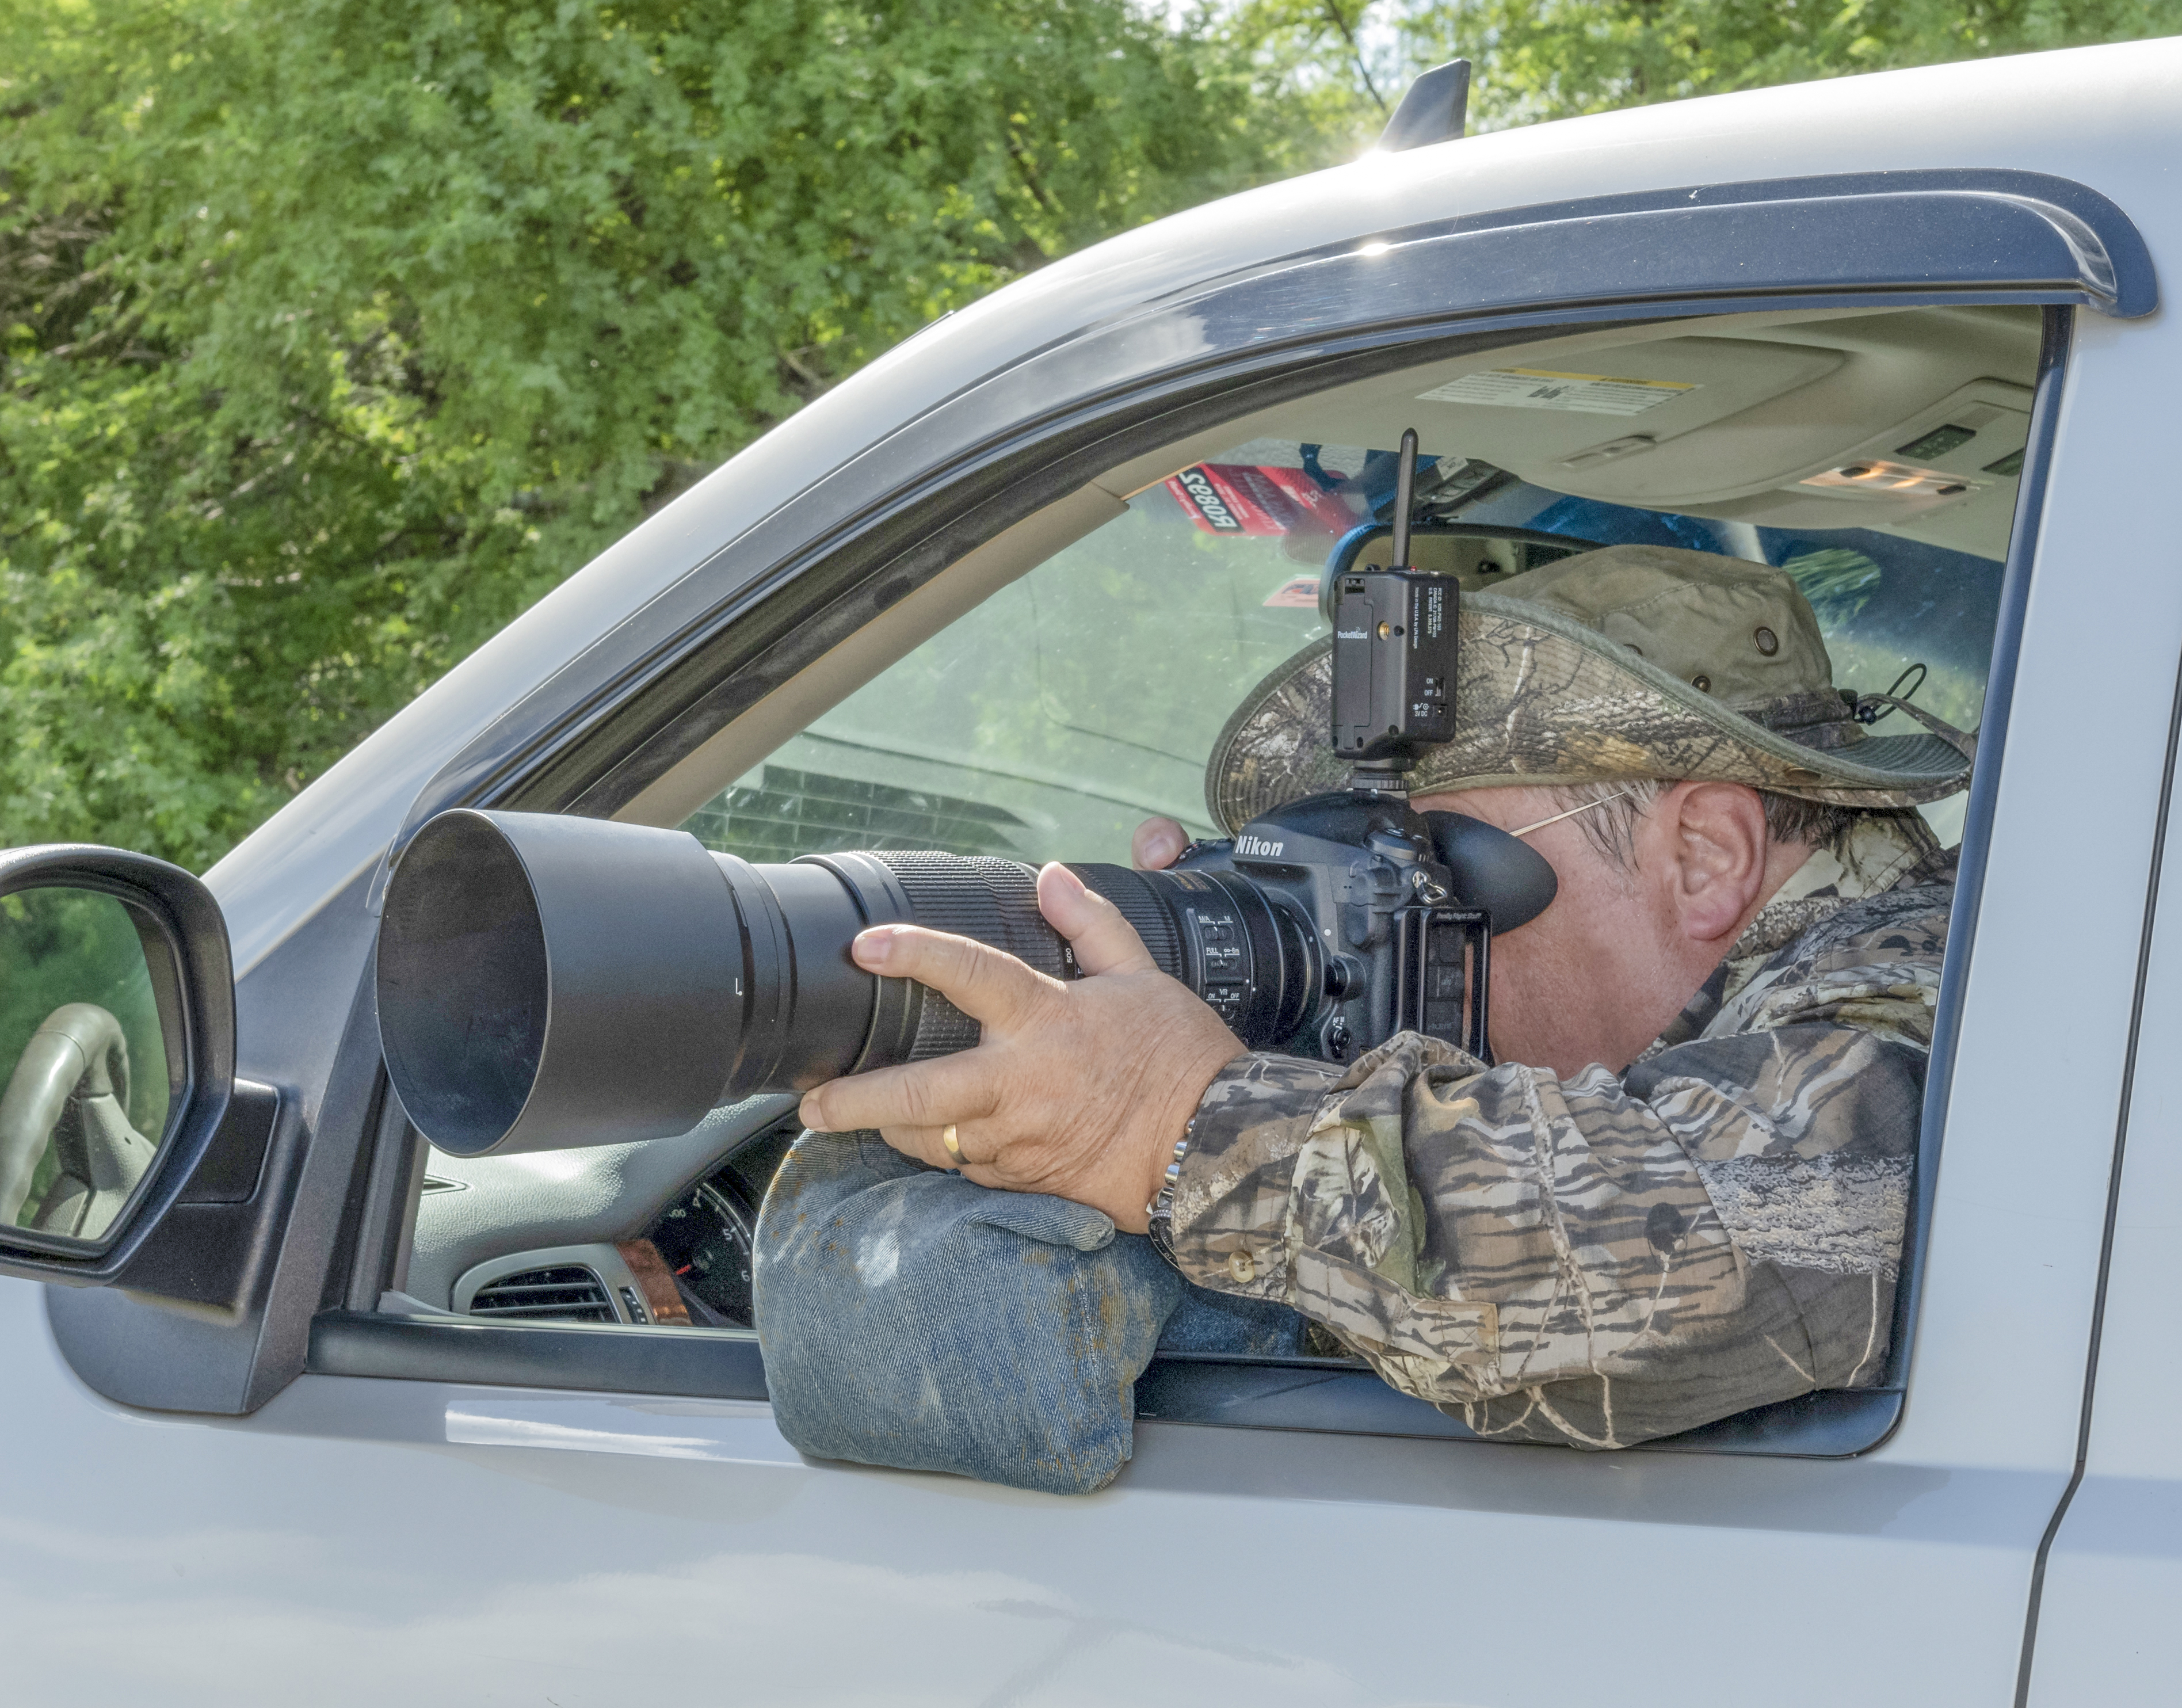
Your vehicle
Other popular blinds include cars — they are the tour de force at wildlife refuges. Wildlife and many birds are more tolerant of a vehicle than of a human wondering around. How many times have you been in a vehicle with the wildlife blissfully ignorant of your presence and as soon as you start to open the door, they take flight?
Another popular blind may be your house for back yard wildlife photography through the windows. The biggest problem with house windows may be light orientation. All too often, the house throws your subject into deep shade while the background stands in full light or you look directly into the sun. We prefer not to shoot through the glass of a window, even in winter. I must say here that I do know a resolution test on simple glass UV (or protection) filters showed that even optical quality filter glass diminishes resolution — not by much, admittedly, but still there was some effect. If you shoot at an angle through a window pane, forget it. Sharpness will be affected severely.
Using natural vegetation
You could use any local vegetation to create some form of blind. Try to not cut down living vegetation to build your blind. You might be able to tie groups of vegetation together to form a barrier. Try to return the vegetation to a natural state when you are finished.
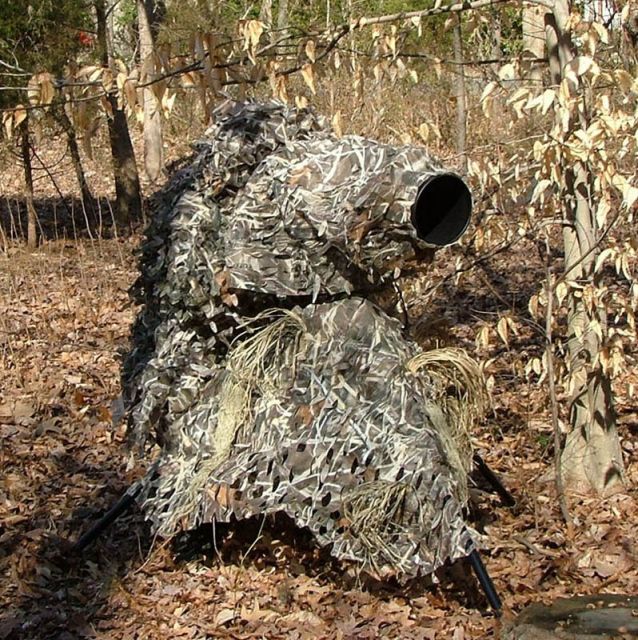
Camouflaged “throws”
Still another concept is a cover-up, a simple wrap of camouflage cloth. A cover-up provides a handy blind substitute that can also double as padding in a camera bag. A dozen feet or so of a bolt from a fabric store should provide enough to cover even a husky photographer. You’ll also need a camp stool or other seat and your tripod. Cover up, sit down, and hold still while the wildlife works its way in close. Cloth provides complete concealment, but you will need to cut a small slit for your camera lens. Photographers playing songs to lure birds often find cover-ups very useful.
Burlap as a covering for your blind is an inexpensive alternative to camouflage cloth and has many of the same attributes as the blinds mentioned above, but at a lower cost. Lawn shops and farm supply stores frequently sell burlap by the yard. This drab brown material blends in well with many habitats just as it is, right off the roll. But, if necessary, it’s easy to change its color, using fabric dye in a washing machine. You can use standard colored burlap and spray paint it to match the surroundings if you feel you need to go this direction.
You can either build a wooden or PVC plastic pipe frame and wrap the burlap cover around all the pieces to carry it to your destination or you can build a makeshift frame out of dead branches tied together with cord, and then drape the burlap over and around. Use spring clamps or string for attaching grasses to the outside of the burlap. This, of course, isn’t nearly as fast a set up as either commercial Leaf-o-flage® or a tent blind, but it works great if you are going to be set up for a couple of weeks.
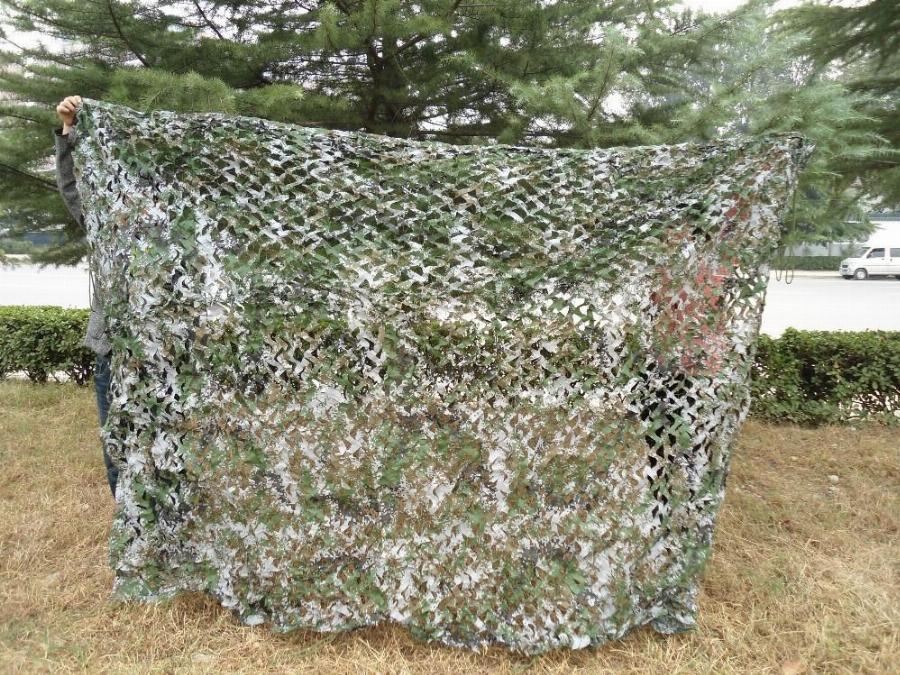
If you decide to build your own blind, many sporting goods stores sell camouflage material by the yard. I often carry a few yards of it in the back of my car, just in case I need to put together a quick blind in the field. Sometimes you can just drape the material over shrubbery to hide yourself, without erecting any structure at all. Or just hammer four pointed 3 1/2-foot-long 2x2s firmly into the ground, attach the camouflage material to them with a staple gun, and cut a slit for your telephoto lens. And then, an instant blind.
Commercial Leaf-o-flage® is a brand name and nothing more than camouflage material with jagged cuts throughout. A convenient size piece is approximately 16 ft x 5 ft. This stuff is great when calling wildlife to within camera range. It is very portable and rather quick to set up. Critters that can be lured by the use of a call include fox, coyote, hawks, owls, turkey, ducks and many more. Armed with camera, calls, and a piece of foam to sit on, I pick a likely spot and sit on the ground with the Leaf-o-flage wrapped around myself and my gear. The lower you can get to the ground, the better. Not only is your silhouette less obvious but it also allows a more eye level view in the resulting photos. Clothes pins can be very handy for securing the material around the lens, tripod, and yourself. If you can’t find this product, you can find some great alternatives in outdoor supply catalogs like Cabella’s or Bass Pro Shop. Go to their web site or do an internet search for blind materials. It comes in many colors to match your surrounding terrain.
The temporary blind, in my opinion, is one of the most useful and can be as simple as fabric throw or a more complex, purchased blind set-up. You can carry it with you and set it up, as needed. Then, when shooting has been completed, you simply take it down and carry it back out with you.
One of the disadvantages of the temporary blind is that they are something you must carry around with you. This might not be an issue, but I often find that I have enough gear to carry as it is, let alone carrying around a blind. A temporary blind is also more impacted by weather, so you will likely need to replace it periodically.
Portable structures (tent like structure)
The most effective way to hide from birds is to use a blind, and every wildlife photographer should have at least one. I’ve had birds come so close to me while I was hiding in a blind that I couldn’t focus my telephoto lens on them. You’ll find many ready-made portable blinds advertised in photography magazines and catalogs, and some of them are nice—lightweight, easy to set up, and extremely compact when disassembled.
One commercially made blind that I often take with me on trips is the N-Visibag portable blind sold Rod Planck Photography. The big advantage of this one is that it has no framework and takes up about the same amount of space in your luggage as a pair of jeans. It’s basically just a large piece of camouflage material that you drape over yourself and your tripod and then attach snugly around your telephoto lens with Velcro. But even this simple blind is expensive, and sometimes you really want to have a blind with an internal frame, so you can move around inside it without disturbing the wildlife. These are even costlier. As an alternative, you can try building one yourself.
These blinds can be very convenient with their fast set up and out of the weather capabilities. I like this type of blind for photographing ducks and herons on beaver ponds in the spring of the year. However, some of the more-wary birds will shy away from them unless properly set up.
Most ground blinds come in a camo pattern, but I like to take to the next level by placing limbs and vines on my blind. I think that it really seems to break up the square shape of the blind.
Camo outside the blind is not the only thing that is important to consider when thinking about concealing yourself from the birds. While in the ground blind it is a good idea to wear dark clothes. Light colors give a good contrast against the black interior of the blind, which makes it easier for the birds to detect your movements.
Portable “walled” curtains
As the title suggests, this method of concealment is simply a length of camouflage fabric stretched to conveniently sit behind. Simply find a promising spot, tie the ends of the fabric between two limbs, and you are finished. Obviously, this is for temporary concealment at best.
Pit blinds
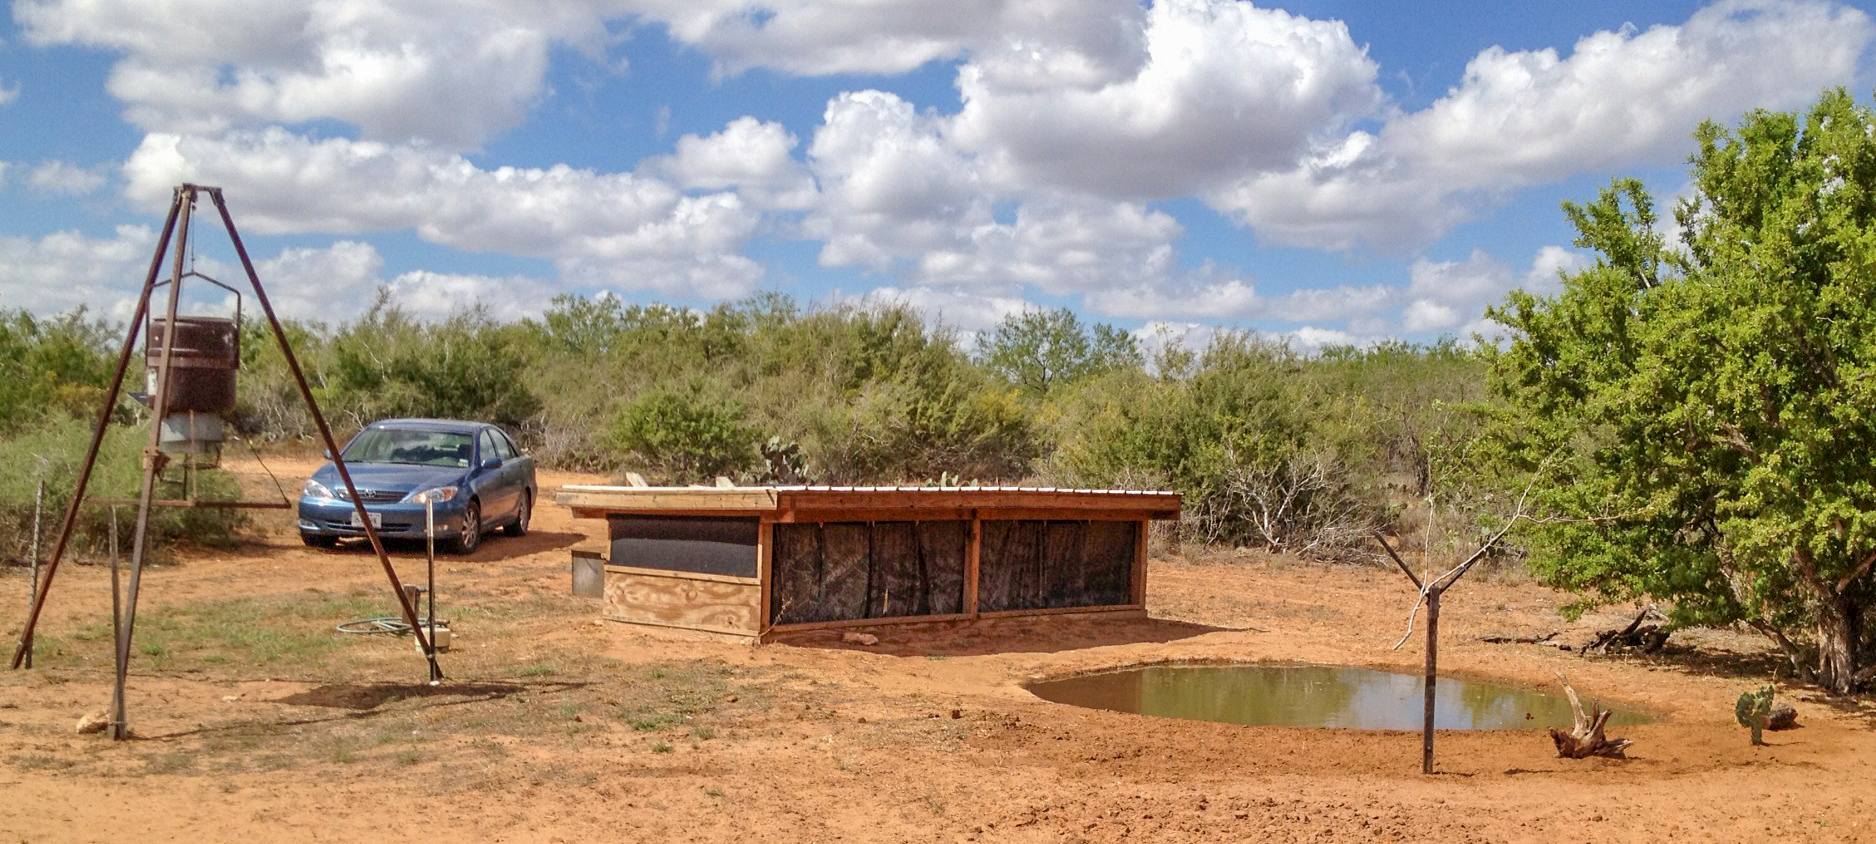
A pit blind is a blind built over a hole excavated in the ground so that the photographer sits at about eye level with small animals on the ground (that is, about 1 foot above the ground surface). This makes it more comfortable than a surface blind. A pit blind also has a lower profile than a surface blind, which is important both for camouflage and for high-quality photography. Generally, you want the sun behind you to light up the subject animal. A pit blind casts a much smaller shadow than a surface blind, so there are more opportunities for good photographs. A blind can be 2 to 4 feet high over a pit that is 2 to 4 feet deep. Reinforce pit walls for safety. Be very careful about pit depth and location to avoid maintenance problems; give special attention to the direction of rainfall runoff to avoid having your blind fill with water. You will probably need to install steps or a ramp to make access easy. A disadvantage of a pit blind is that it cannot be moved.

Solid structures (buildings)
These are fixed structures, much like a shed with viewing holes in the sides. They are often found in public places and are used for bird watching.
The permanent blind, as its name implies, is a permanent fixture. The permanent blind is usually hardscaped, using lumber or some other type of weather-resistant building materials. If you fabricate a permanent blind on your own property, or if you get permission to place a permanent blind on someone else’s property, then a permanent blind can be invaluable. Once installed, it is there until it is dismantled, and very little upkeep is required to keep it functional.
However, one of the downsides to the permanent blind is that it cannot easily be moved, so if the animal of interest decides to move its location, then the blind will no longer be beneficial. Also, most of the time we want to use a photographic blind, it will be on public or private property, where a permanent structure is not allowed.
When working in hot climates, I add ventilation holes made of camo netting near the top of the blind to allow the hot air to escape. Photographers have been known to suffer from heat stroke when exposed to high temperatures for a long period of time. Always take water into the blind. If extremely hot, carry a spray bottle filled with water and spray it on your skin. The cool water drops your body temperature. Even wetting down the interior wall of the blind can lower internal temperatures. When working in hot humid conditions, avoid bring the camera and lenses indoors unprotected where the moisture from outdoors will condense on the glass. Place camera and lenses in a plastic bag where any moisture will form on the surface of the bag and not the equipment. Similar problems can develop when lenses are taken from a warm room into cold. In humid conditions, consider storing camera gear in a bag with silica gel, a drying agent.
You will also want to purchase a comfortable chair or stool to use in the blind (you may be sitting a long while). The chair needs to be high enough that you sit comfortably behind your camera and be able to look through the window without too much movement.
Specialized Blinds
Tower blinds
These are used as the name suggests, to gain height from the ground. Some are on frames and others are “bolted” onto the tree. Or some can also be built right into the tree like a tree house.
Blinds are not only a wonderful way to hide from wildlife on land, they can also be used effectively in the water and in the tops of trees. Hiding your blind in the water among cattails and bulrushes can get you eye-level views of ducks, geese, grebes, pelicans, and shorebirds, not to mention courting muskrats, water-logged beavers and playful river otters. Treetop photography takes more preparation and care. You can erect free-standing towers (I’ve used some as tall as 15 meters) or modify a conventional tree stand used by hunters and surround yourself with a screen of fabric. Just remember, when a photographer falls out of a tree he/she generally hits the ground with a boom, very little bounce, and a whole lot of ouch.
Floating or Boat blinds
Borrowed from the world of duck hunters boat blinds are used to break up the outline of a boat and the occupants within.
Blinds that float can provide a wonderful opportunity to get near waterfowl and afford a very low shooting angle, as cameras are mounted on the water-level platform from which the photographer shoots. Chest waders are worn to keep the photographer warm and dry. From the research I have done, there aren’t readymade ones available, but there are plenty of floating blind construction plans and videos readily available on the web. The basic materials include plywood, water pipe, foam insulation, aluminum rods and camo material.
Once you have the photography blind kitted out for nature photography and you are confident with setting it up quickly. It’s time to learn some general tips about using a photography blind.
How and where to locate a blind
Location, Location, Location!!!
As in real estate, location is the most important consideration. Wild animals must always have three things: Water, food and safe shelter. All three of these must be available at your blind location for success.
In order to get the most out of using a photographic blind, you have to follow rule of “Location, location, location.” If you put up a blind where the subject will not be, how are you going to capture images of it?
First, set up a trail camera where you suspect activity. Let it roll for a few days, or a week, then see if this looks like a good spot for a blind. Also, look for a location near a good food or water source. These will usually be great locations for wildlife activity. Take a hike, and look for tracks, or other signs of activity. This little bit of up-front work can save you lots of time!
Always take time to study an area carefully before you set up your blind. Look for places where birds are present at particular times of day and check out what the background is like and whether there are any objects that will get in your way when you’re taking pictures. If plant cover is available, try to set up so that your blind blends in naturally. Whenever possible, let your blind stand in the field for a few days before using it. Birds quickly become accustomed to the presence of a blind.
On ponds, I often have two blinds, one for morning and one for evening shooting. Some photographers working on long-term projects place their blinds over a dug-out trench. Chairs are placed inside so the photographers can shoot at eye level with their subjects. I find with a long lens such as a 600 mm and a little extra distance from the subject, the angle of view is relatively horizontal giving the illusion that you are shoot eye to eye with the subject. For best results, while in the blind stay alert. Animals approach very quietly. Listen carefully and watch for movement. It is not the time to read a book.
These blinds are not some magic solution that will make you take better wildlife images. You still have to know where to set them up (places the animals will congregate), and they are not sound proof. But, if you are like me, and walking around is not really a good option most of the time, but you still want to have the chance to photograph some wildlife images, then these can be a portable, lightweight, and an overall great solution.
Scout the location you will be using the photography blind in.
Don’t rush this step! Check where the wildlife is most abundant; Which way they travel when arriving or leaving? Which way is the light coming from when you plan to be there? The same principles of photography still apply with regards to lighting. Is there any natural cover you can use to help you “blend” your blind into? If you are photographing waterfowl; Which way does the wind normally come from? You still want the wind at your back for waterfowl, to get the head on shots of the birds landing as birds normally land into the wind.
Although birds can be found all over the place, however places that have food and water nearby usually have a higher density. Remember this when you are thinking about where you want to set up. Also, try not to set up too close to where the birds are, but also not too far away. If you set up too close you can spook them, and if you set up too far your camera may not be able to zoom in on the birds as much as you would like. Finally, look for possible lighting issues while looking for a place to put your blind down.
Blend the photography blind into the surrounding vegetation.
Try to blend your blind into some surrounding vegetation to help break up its outline and to provide additional shelter for wildlife.
Clear Field of View
Having a clear field of view is of course one of the most important things to consider before you start shooting. You don’t want to have that special shot because a leaf or a twig got in the way and ruined that special shot you’ve been waiting for. So, when you first get in your blind check the places where you want to get your shots and make sure there is nothing in the way, and if there is just simply snip it off.
Sun Angle
Try to set up the blind so that the light will be coming from behind you at the time of the day you plan to shoot. For example, since sunrise and the hour or two after are often birds’ most active periods, many bird photographers site their blinds facing west. Hammer those stakes in hard, and make sure to leave a couple flaps open to allow wind to pass through if you’re leaving it out for a few days (if all closed up, it will blow over more easily).
Prevailing winds
Often, photographers are worried about wind direction. That concern is more important for mammals than for birds. If it is worrisome, try to get a sense of the prevailing winds and attempt to locate the blind down wind from the subject location. That will better help eliminate scent issues when photographing.
Backgrounds
For placement of the blind, I consider the background behind the subject and the surroundings where the subject will be photographed. Bright rocks, shiny objects, bright colors, and dark strong forms if distracting should be avoided. The direction of the sun at the time of day you plan to photograph should be considered. Usually I prefer to have the sun to my back or to the side.
Choose a location for your hunting blind with an attractive background, such as a flowering bush. Front lighting is ideal, so find a location in direct sunlight, with the sun in front of the birds (and thus behind you). The lower the sun is in the sky, the more attractive the light. Birds will need a place to perch. If there’s not an ideal perch with a nice background, find a large branch and bury the largest end of it about 6 inches into ground in front of your background. Setting up a perch gives the birds a place to land and allows you to control the bird’s placement in the light and against the background. Animals in the area will initially be disturbed when you set up a hunting blind. However, birds generally reappear in about ten minutes, and will remain unaware of your presence as long as you’re quiet and you don’t move your camera lens too suddenly. Animals that later come across the hunting blind, such as deer or fox, might not notice the blind at all.
When photographing songbirds, I typically set up the blind 6-15 feet away from where I want the birds to perch. For larger animals, set up the blind at a distance that will allow you to almost fill the frame with your subject. When working at close range with small animals such as songbirds, you might need an extension tube to focus closely enough. A 24mm extension tube with support for autofocus is perfect for most telephoto lenses.
While the hunting blind is designed to hide your movements, it’s still important to minimize how much you move around. Use a tripod to hold your camera upright with the lens slightly protruding from the blind so that you don’t have to lift your camera when a subject comes into view. Some animals will be scared by the sound of your shutter. Many new cameras support a quiet shutter mode that can help. If your shutter continues to scare animals, you’ll still be able to get one shot—take your time and make sure you have eye contact before you press the shutter.
Patience, Persistence, and Perseverance Pays!
The longer you spend in a photography blind, the better your results will be. It’s tempting to occupy yourself with a book or smartphone. However, the minute you look away, your subject will appear, and you’ll miss your shot. A better option is to listen to music or an audiobook with a single ear bud, keeping one ear open to listen for animal sounds.
When to use the blind
Blinds can be used in any season but naturally they are most helpful when there is some predictability to the movements of the local wildlife. In winter, I’ve set up different blinds beside ice-free areas of frozen lakes and rivers where bald eagles and mink were hunting, and muskrats and waterfowl were feeding.
Winter is also a good season to take advantage of road kills, of which there are millions annually. In such a situation you may attract a guild of scavengers from eagles, ravens and magpies to coyotes, wolves and bears, and the careful placement of a blind can yield exciting opportunities. Autumn and early spring are often good times to scope out locations for resting and foraging avian migrants such as swans, geese, ducks, sandhill cranes and shorebirds. Not surprisingly, the most productive seasons in which to use a blind are late spring and early summer when birds are hatching, young fox and coyote pups are playfully bouncing about and nature is in full renewal and replacement.
So, if you haven’t made the plunge and spent time entombed inside a blind, do yourself a favor and give it a whirl. No matter what happens, it’s always an unpredictable adventure and sometimes an exhilarating rush.
How to use a blind
Plan to arrive several hours before you plan to photograph.
To get the most out of your blind, there are a few simple rules you should follow. First, get to the location and set up the blind (as needed) before the wildlife arrive. And when you are done shooting, wait in the blind until the wildlife have gone. This is a very important rule to follow, if you want the wildlife to continue using this area.
A few years ago, I photographed the Greater Prairie Chickens at a wonderful location on a Kansas prairie. But over time, because of a few people arriving late to the blind, or leaving early, the chickens moved their “lek” (the springtime location where they display and choose mates) to a different area that was on someone else’s land. Since the neighbor landowners didn’t want anyone on their property, prairie chicken photography was ceased at this location. So please don’t just think of yourself, but think of others, too!
And, if the wildlife is close to the blind, consider whether you should shoot a barrage of shots (known as a “burst”), or single shots. Often, wildlife is disturbed or frightened when they hear the noise of a smoking-hot motor shooting 10 frames per second! In these cases, it may be best to shoot single shots, and waiting a few seconds between shots. This is not the ideal situation, but it beats five quick shots in a row, followed by the subject running off!
Unfortunately, the old advice of putting your photography blind on location a week before and slowly moving it closer, will only probably have someone steal it before you get to use it. Also, you want to draw as little attention to what you are photographing as possible these days. Sadly, there are people that have little regard for our wildlife or the natural environment and will investigate what you are doing if they see a “strange” tent out in the bush. It can be very frustrating to prepare well for a shoot only to have a stranger walk up to the blind and stick their head in and ask, “What are you doing?”, only to scare away what I was photographing. If you arrive early you can set up, you will probably scare everything away, but if you are quick setting up and settle in with a minimal disturbance the creature will usually return in a short time.
Keep movement and noise to a minimum.
Once you are inside, you still have to keep your movements to a minimum. Set everything up upon first arrival. Test everything out so that all is in readiness when it’s time for the first photography. Once you are confident of the setup, leave it alone.
Be mindful of noise in the blind. Sound travels further than you can see! Turn your cell phone off, or onto silent mode before getting to the location. Phone rings will scare all the wildlife away in a startled flight. It is interesting that most birds and animals don’t seem to mind the sound of the shutter firing, they hear the sound of the shutter firing and are curious more than anything but a telephone ringing, well that just scares them.
If there are several people in the blind, maintain quiet and observe the no talking rule. Do not make big gestures in pointing out subjects and keep voices to a whisper when necessary.
Also, a big, quick movement of a long lens will certainly attract the attention of photo subjects at the least and frighten most away off very quickly.
Take everything you need into the photographic blind with you.
Plan well in advance. Take all the equipment you will require to the blind with you. You don’t have to take everything you own, nor the kitchen sink. Over time you can streamline your list to serve you well. Don’t forget spare batteries for camera and flash and sufficient memory cards. And, don’t forget to take water, a snack, insect repellent etc. with you as you may be in there a few hours at a time.
And don’t forget to make your blind as comfortable as possible. You may be spending hours at a time in it. It should be at least three feet high, so you can sit up and change your position if you get stiff. In damp or guano-covered places, put down a waterproof ground cloth to keep you and your equipment clean and dry. And take plenty of water and snacks.
Cover Scents, Game Calls
If the animal has a good sense of smell such as a coyote, then fox urine, skunk and other cover scents distributed around the blind will help disguise your presence. Like hunters, you could use game calls to attract animals closer to the blind. Duck and turkey calls, courting sounds, and predator calls can be bought in most hunting stores. Decoys placed in front of the blind can also increase your chances of success. Decoys are available for ducks, geese, turkey, etc. From their stands or camouflaged boats, duck hunters use both calls and decoys placed in the water in front of their blinds to attract waterfowl flying overhead.
Feeding, Bait
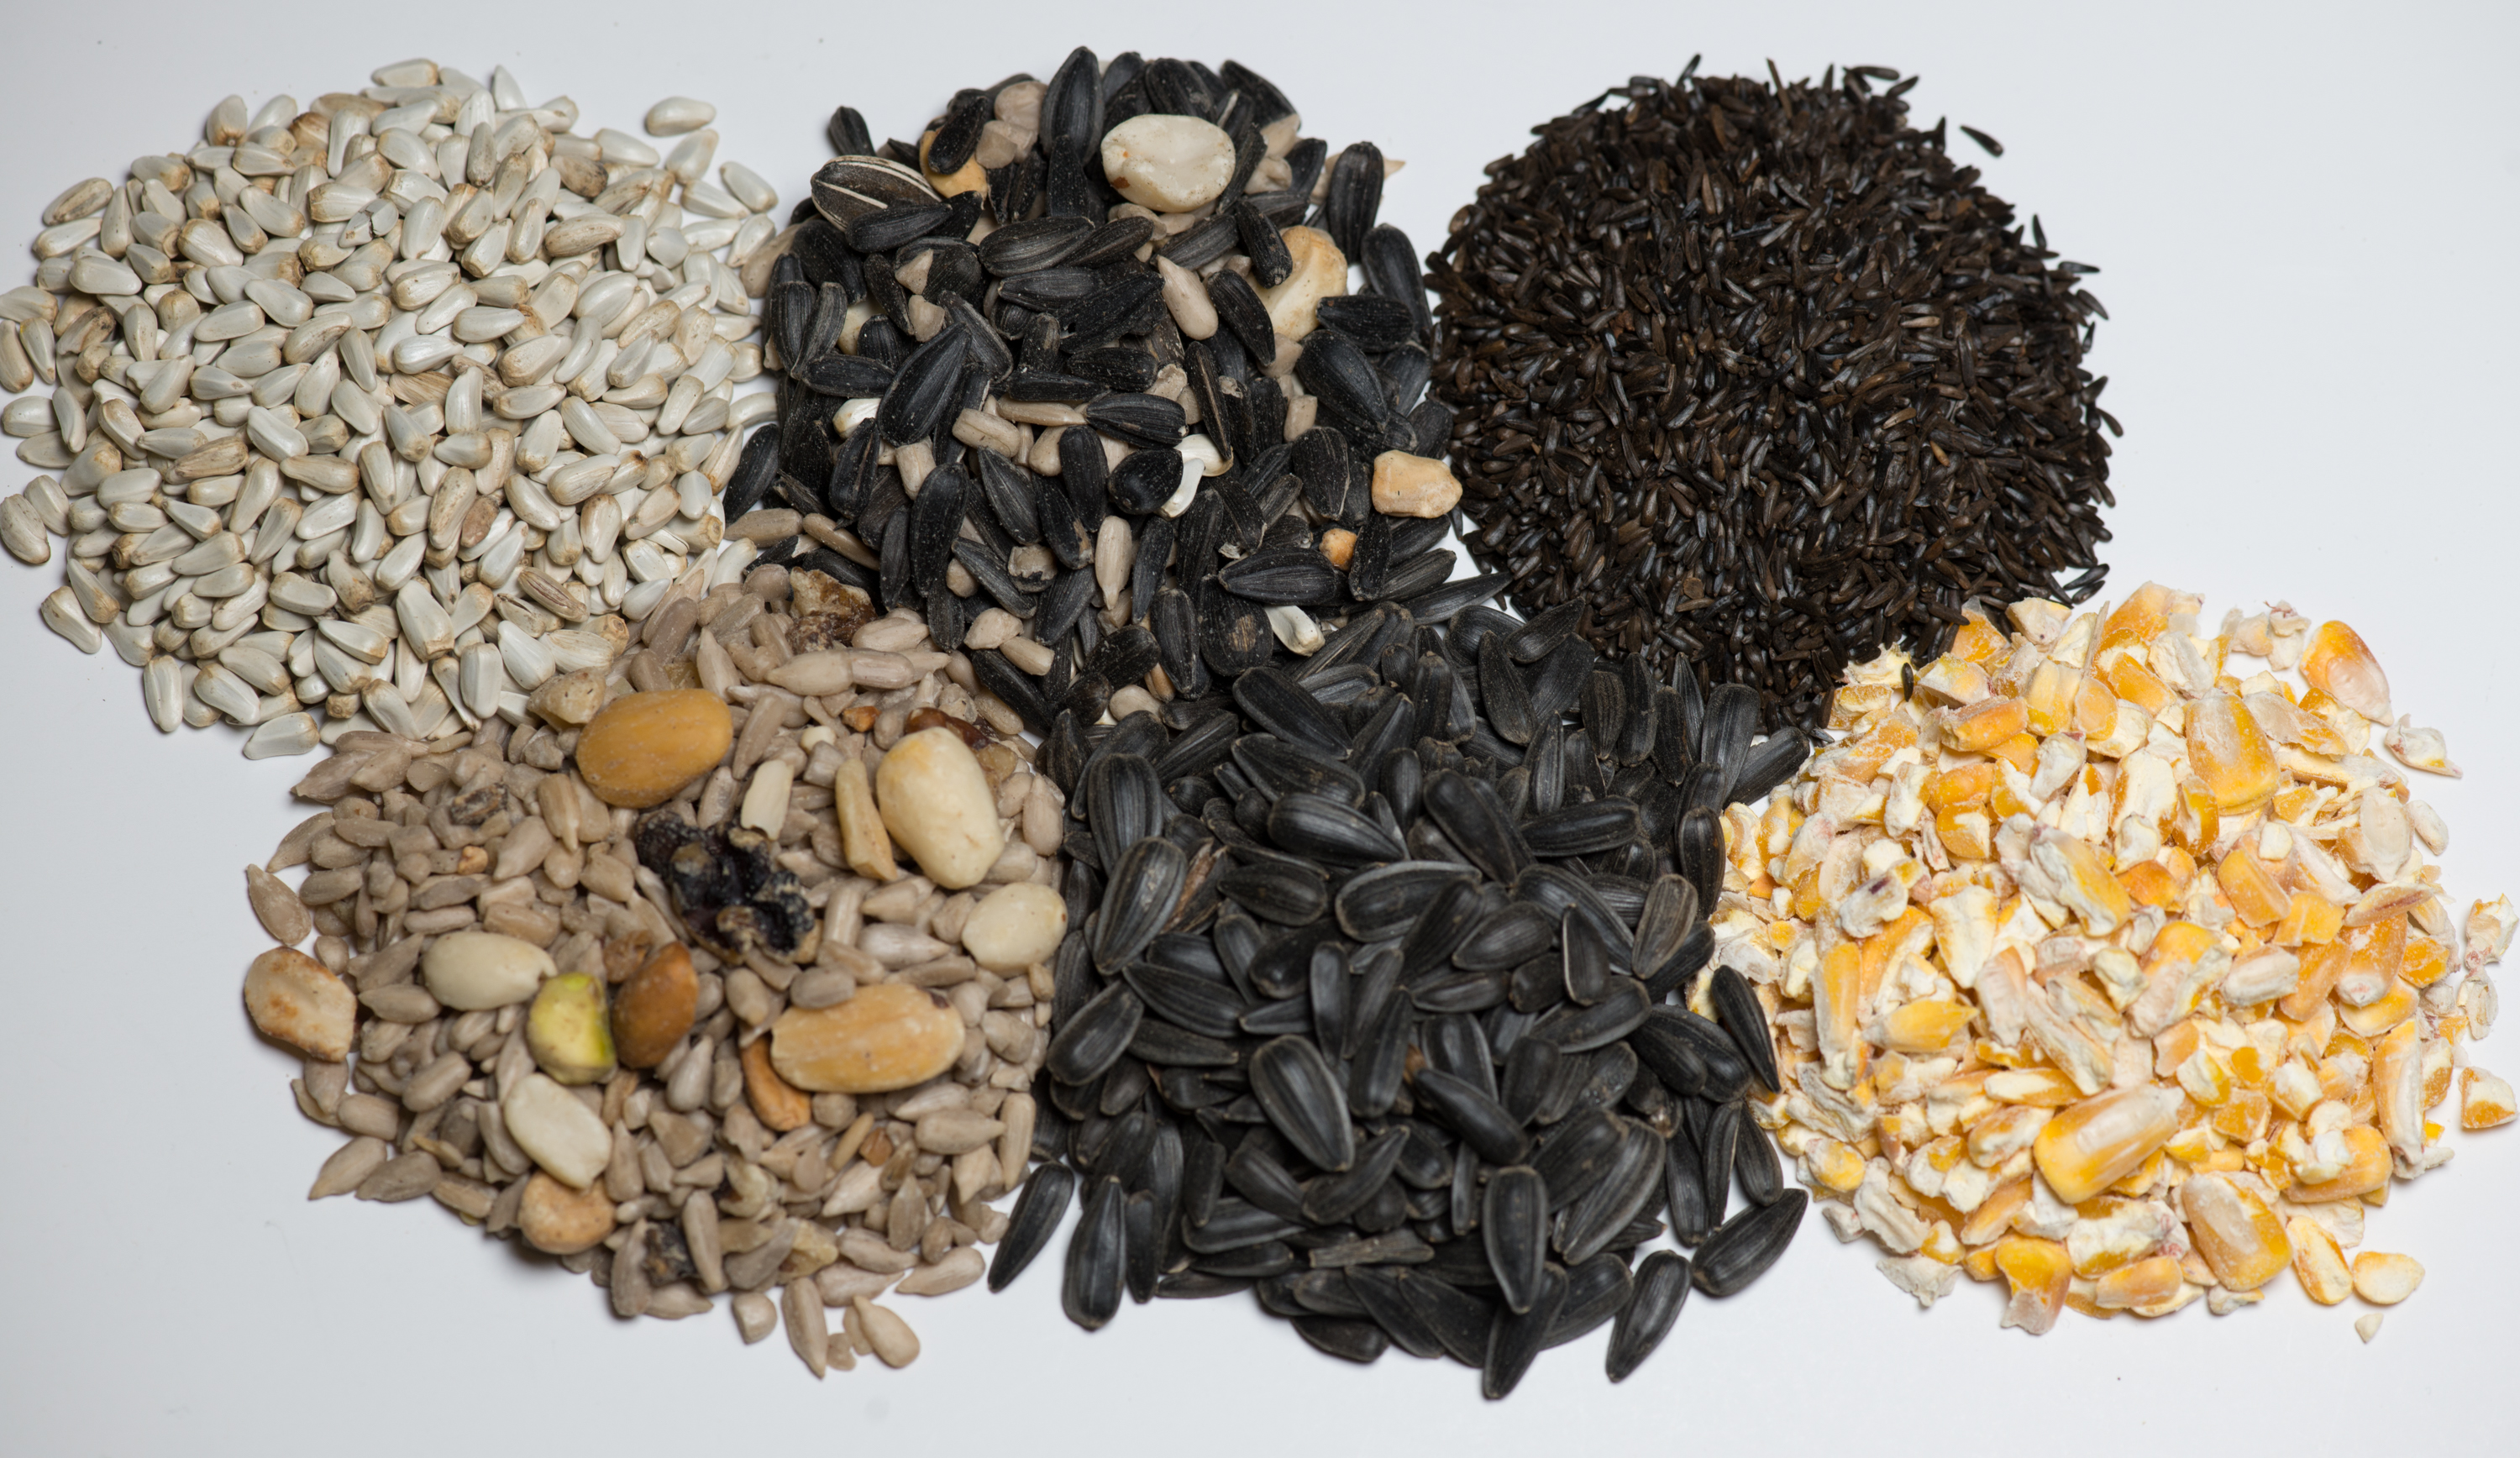
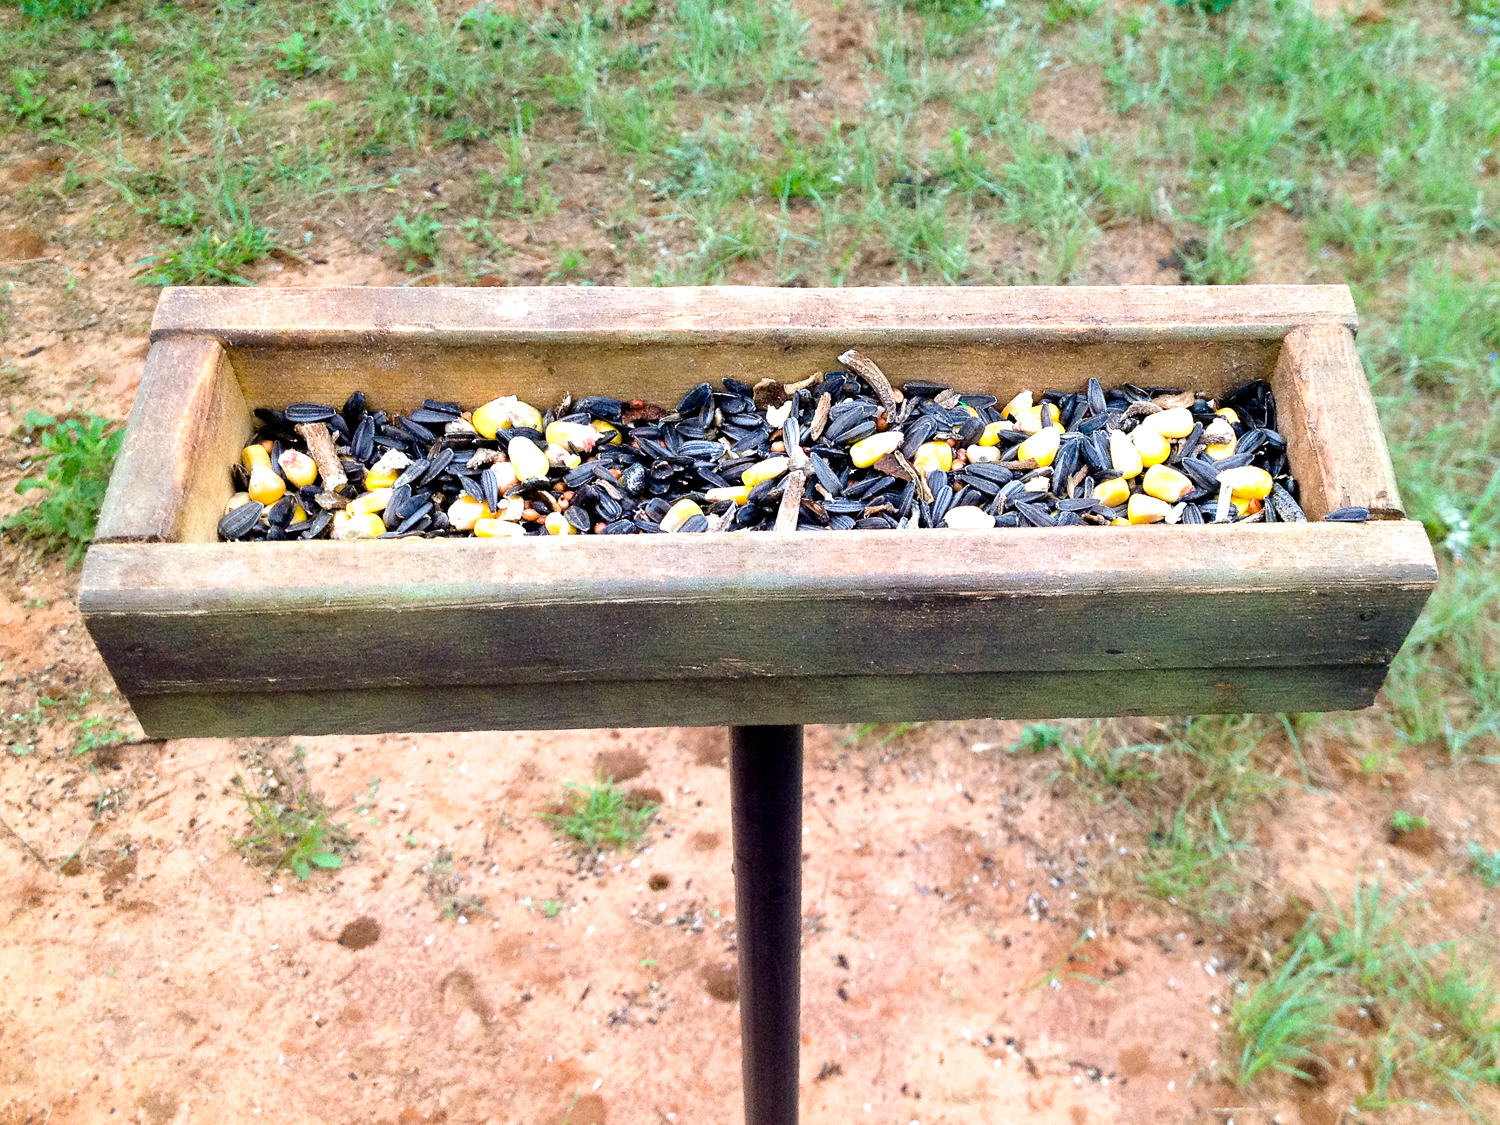
On privately owned ranches and farms, baiting is a great tool to attract wildlife. Obviously, you must have the owner’s permission to be on their land. You typically want to bait areas where you want your subjects. For deer, javelina and waterfowl, I have used whole corn (in water it sinks under surface). For songbirds, sunflower and other birdseed is perfect and for woodpeckers depending where you are located, suet or fruit may be effective. Cat food works well for raccoons and some other mammals.
On government land, private blinds and baiting are typically prohibited. However, on some refuges, blinds are provided for visitors. Without bait and decoys, these are often not as effective as a blind where you can add enticements.
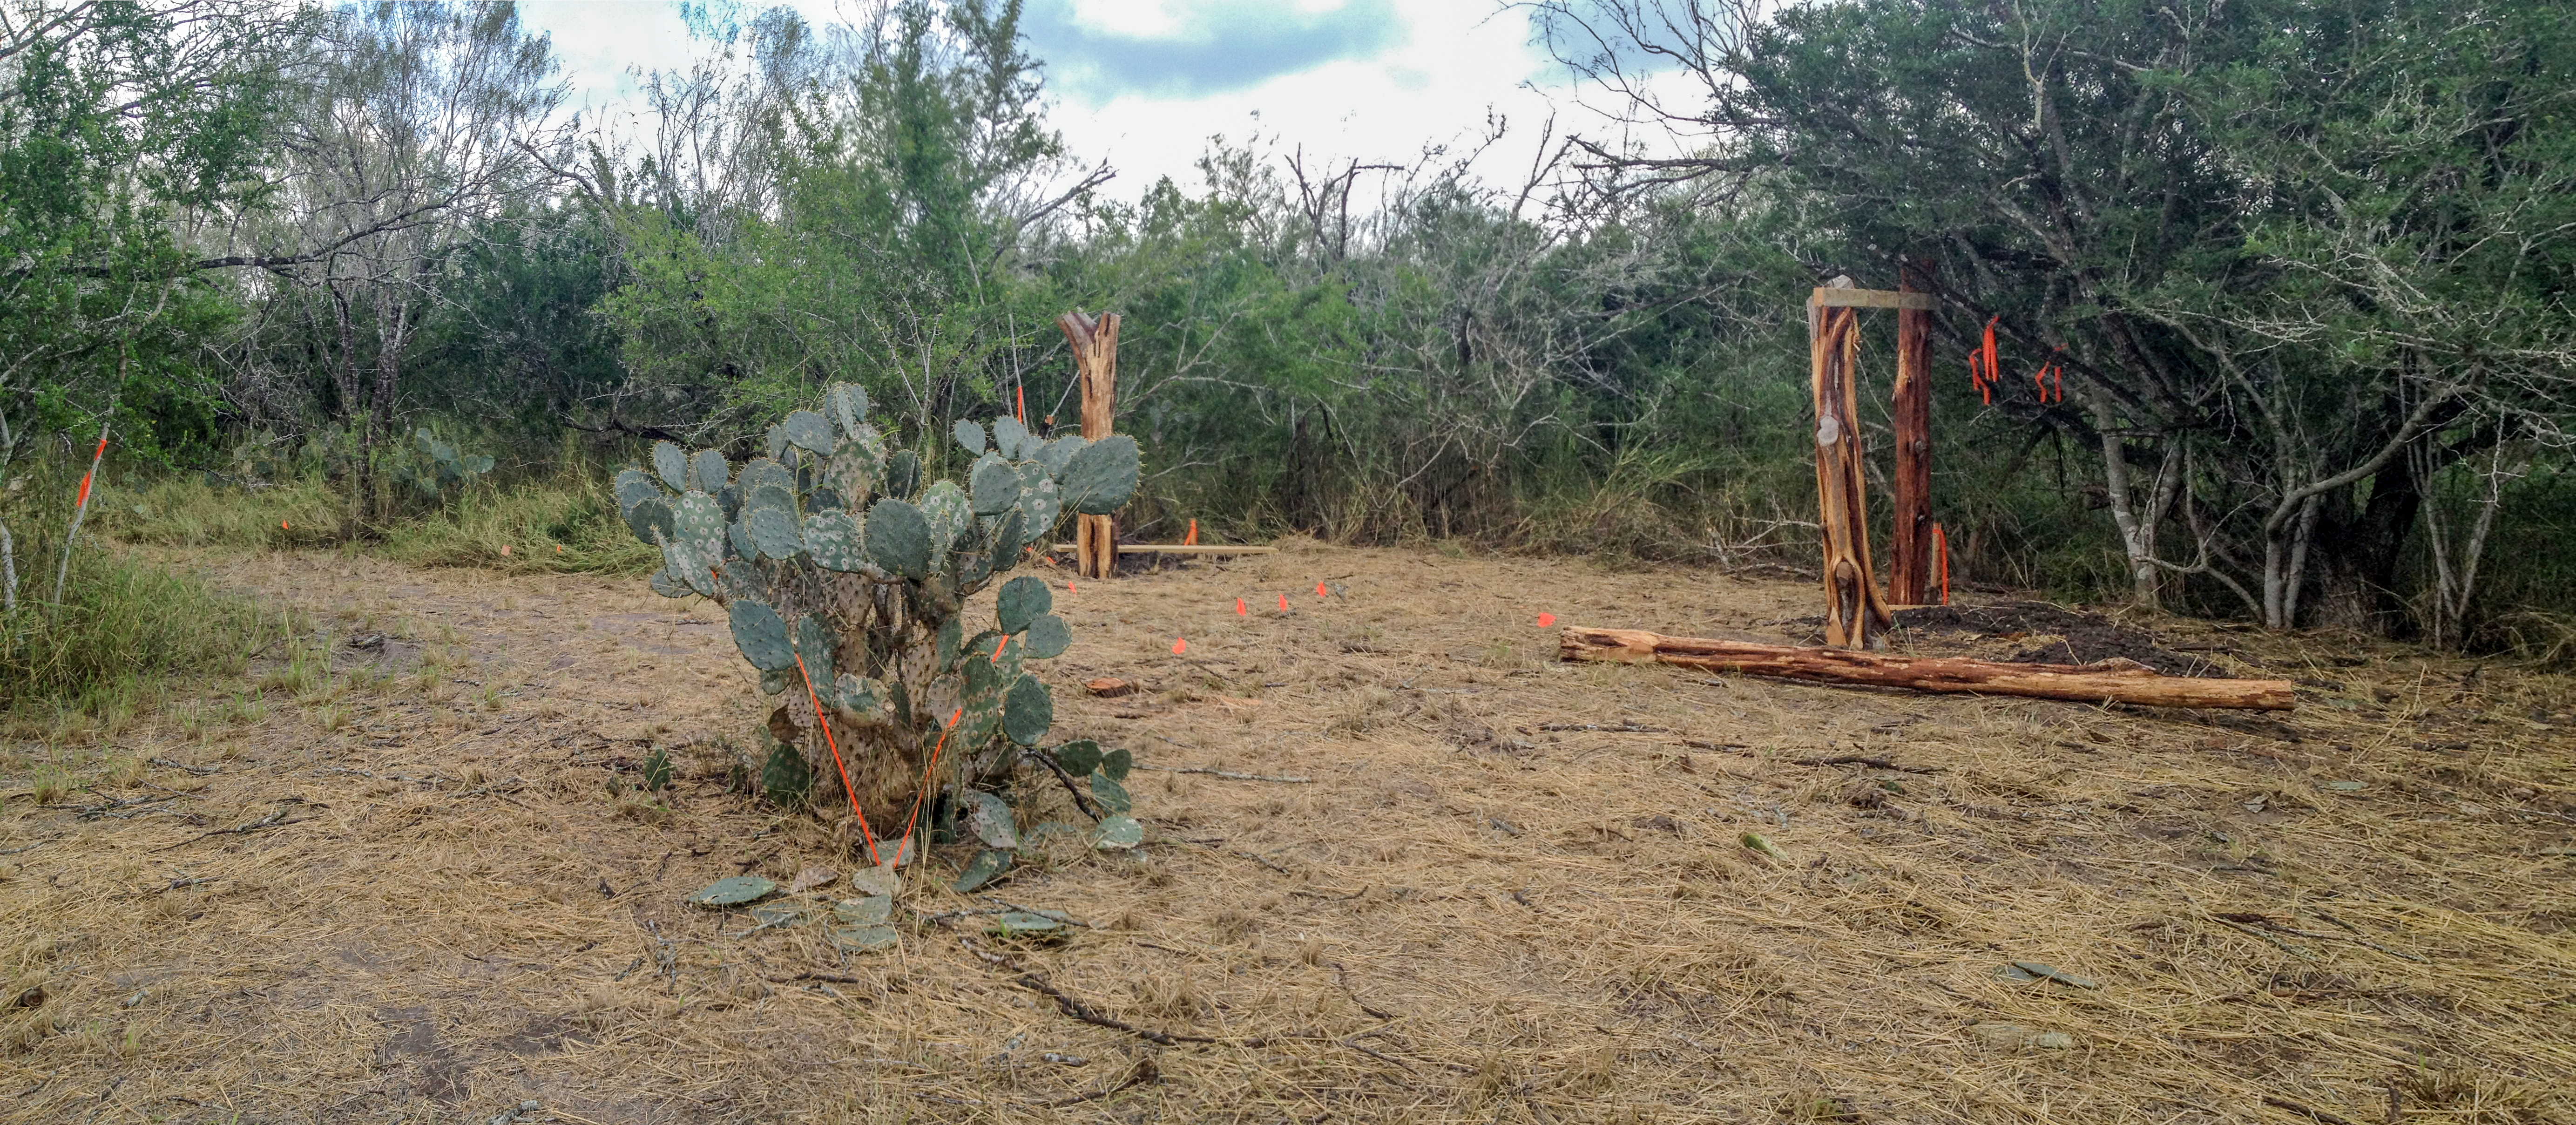
I spent a lot of time in South Texas on a ranch where I could deploy blinds where I desired, at watering holes etc. In many cases, I enhanced the environment with logs, bushes or perches.
I have also placed a blind in a ditch or pond using a float designed for fishing or a Styrofoam platform of my own making.
Make the blind comfortable. You will likely spend hours at a time in it, so make it as pleasant as possible. Take bottled water with you and use a portable chair/seat (if you have room).
How to construct a blind
Access to the blind
While photography blinds are understandable remote, ease of access is a prime consideration. The market that will use the blind is of significant value. Young, elderly, disabled persons all have different requirements. Think about the market potential as you plan and locate the blind.

Blinds Size
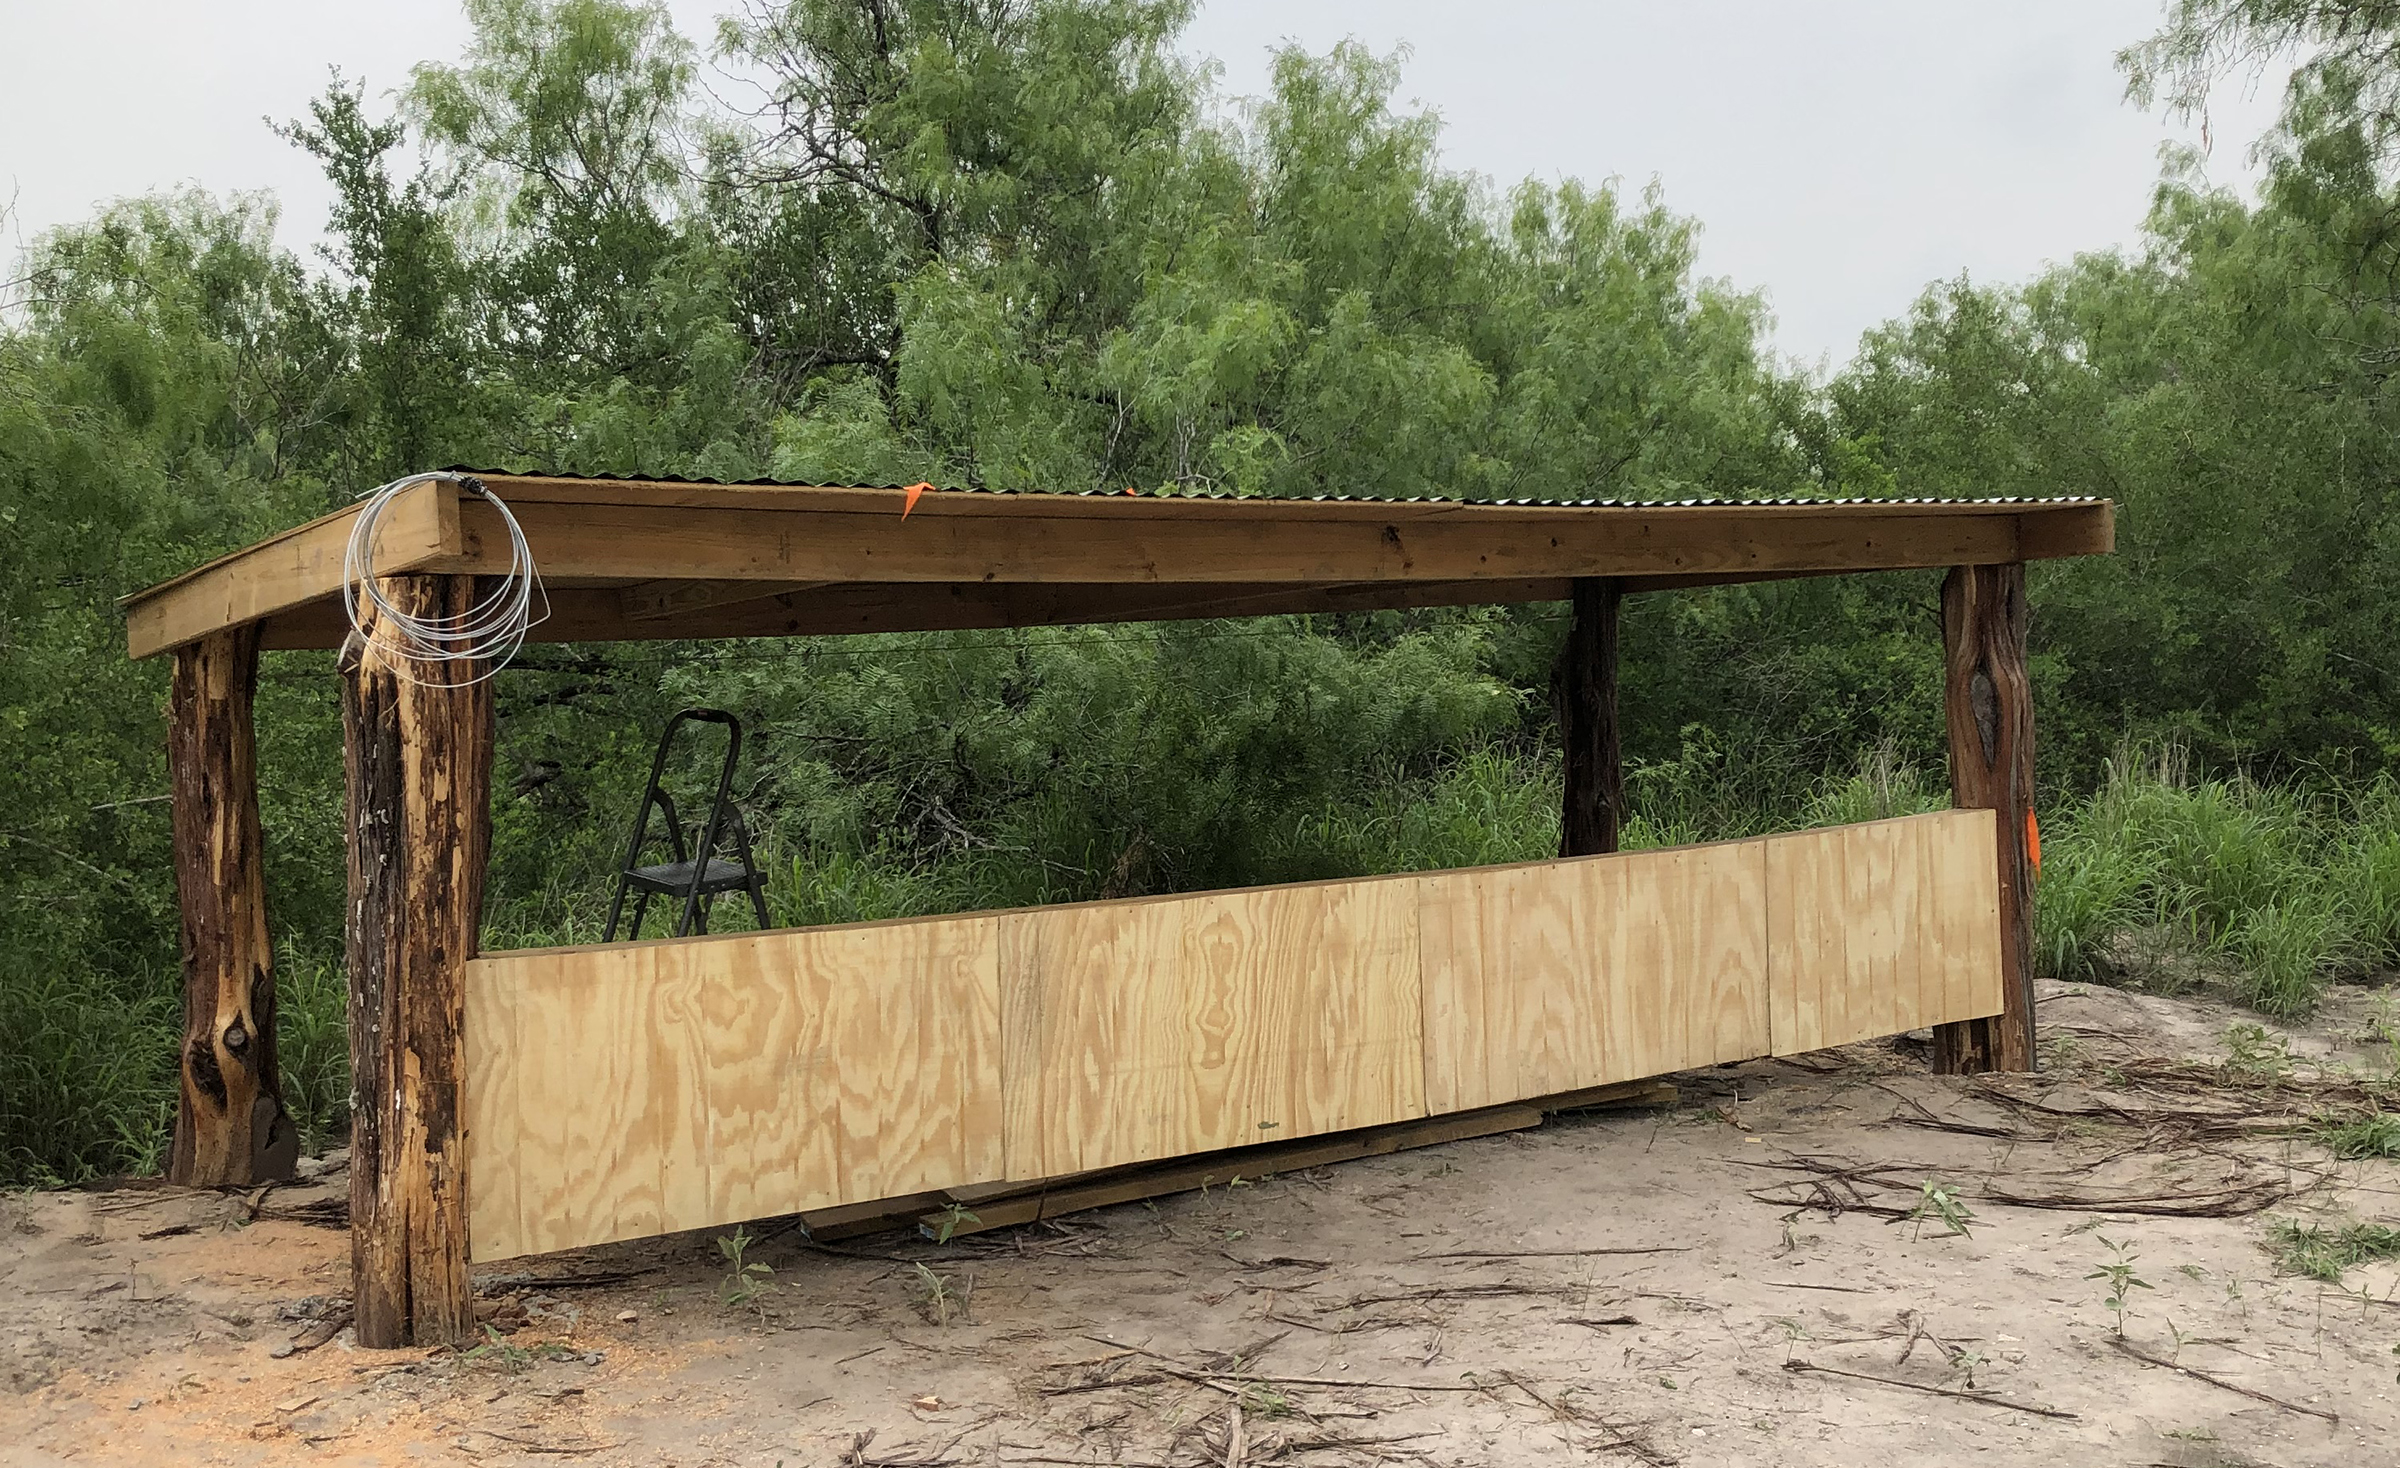
A blind should be at least 5 feet high so the photographer(s) can sit upright, but it doesn’t necessarily have to be tall enough for people to stand in. Photographers are usually in the blinds just 2 to 3 hours at a time so they don’t need to stand and stretch. A one-person blind should be at least 4 feet deep and 4 feet wide, preferably larger. If a blind is to accommodate more people, it should have 3 to 4 feet of width for each photographer, plus space between photographers. Camera ports should be about 3 feet by 3 feet and the edges of camera ports should be at least 2 feet apart. Each photographer needs about 4 feet of space for tripod and gear. With additional people there will be additional movement, and it may be helpful to make the blind deeper (from front to back) so people have space to walk behind each other and to store gear.
Another option is to leave the entire front open, which allows ample room to maneuver large lenses or cameras with flashes. To cover the front, run a cord or wire across the inside of the blind above and below the window and hang pieces of camouflage netting between the cords with clothes pins. The netting should be lightweight and opaque “mosquito netting,” which allows good outward visibility. Allow the netting to drape over and around the lens to cover it and the photographer’s movements. A port should also be placed in each end of the blind unless an end is up against rocks or vegetation and can’t be used.
Construction
You might consider building your first blinds with PVC frames (11⁄4-inch-diameter pipe) wrapped with fabric. These blinds are mobile and inexpensive.
Once you know the exact locations where blinds should be, you might want to make them out of more permanent materials. Even then, however, you could build them on skids so they can be moved.
Don’t forget to anchor lightweight PVC blinds with tie-downs or pins in the ground.
Design considerations
Roof. A tarp or other rainproof material can be used instead of plywood or tin. But it will need to be secured so it won’t flap noisily in the wind.
Back. If not made of wood, the back is covered by burlap, solid camouflage cloth or nylon shade cloth to prevent the passage of light. As many as four layers of shade cloth may be needed. Using solid camouflage cloth will improve the aesthetics of the blind, which could be important to your customers.
Sides. The sides are usually covered with the same material used for the back to prevent the passage of light. Openings can be created and screened with camo netting. Generally only view ports are needed in the sides, not photo ports, because they are used to spot wildlife approaching the blind.
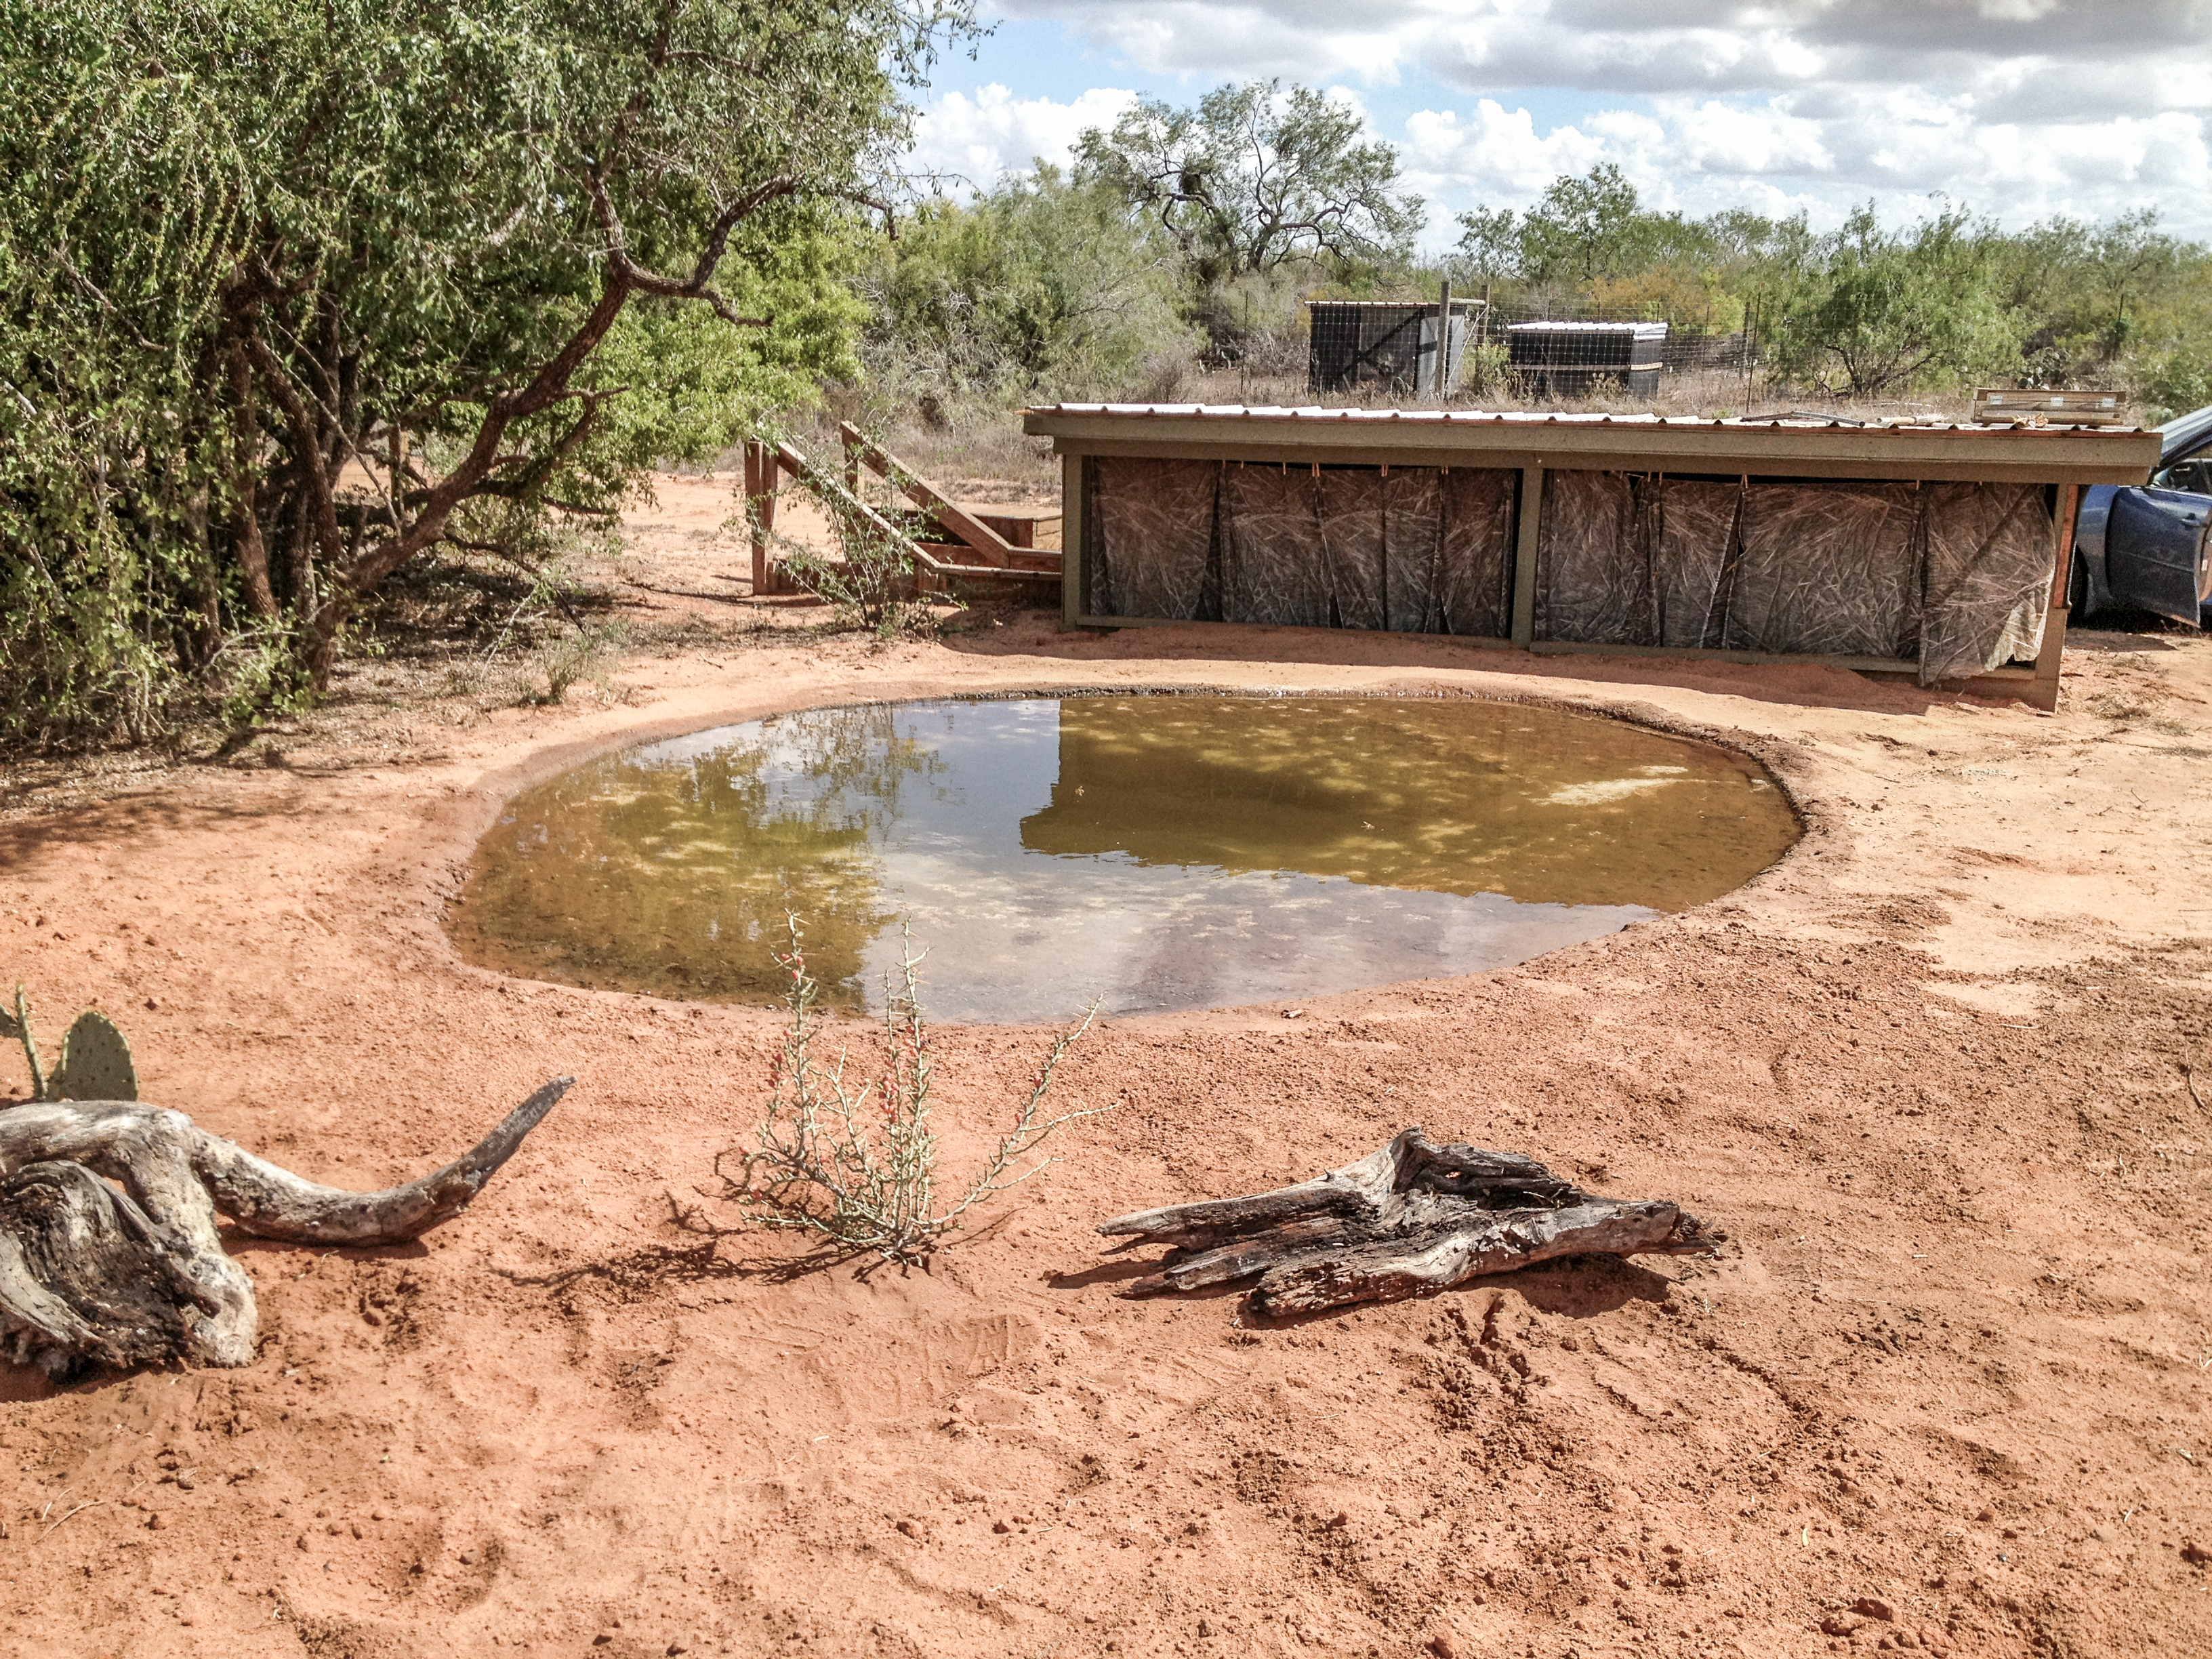
The entire front will be left open and camouflage net- This portable surface blind has a welded aluminum frame, plywood roof, and nylon shade siding. It could also be fitted with a waterproof tarp on the roof and sides. The opening would be covered by the photographer with the fine camo netting attached with clothes pins to cords above and below the opening.
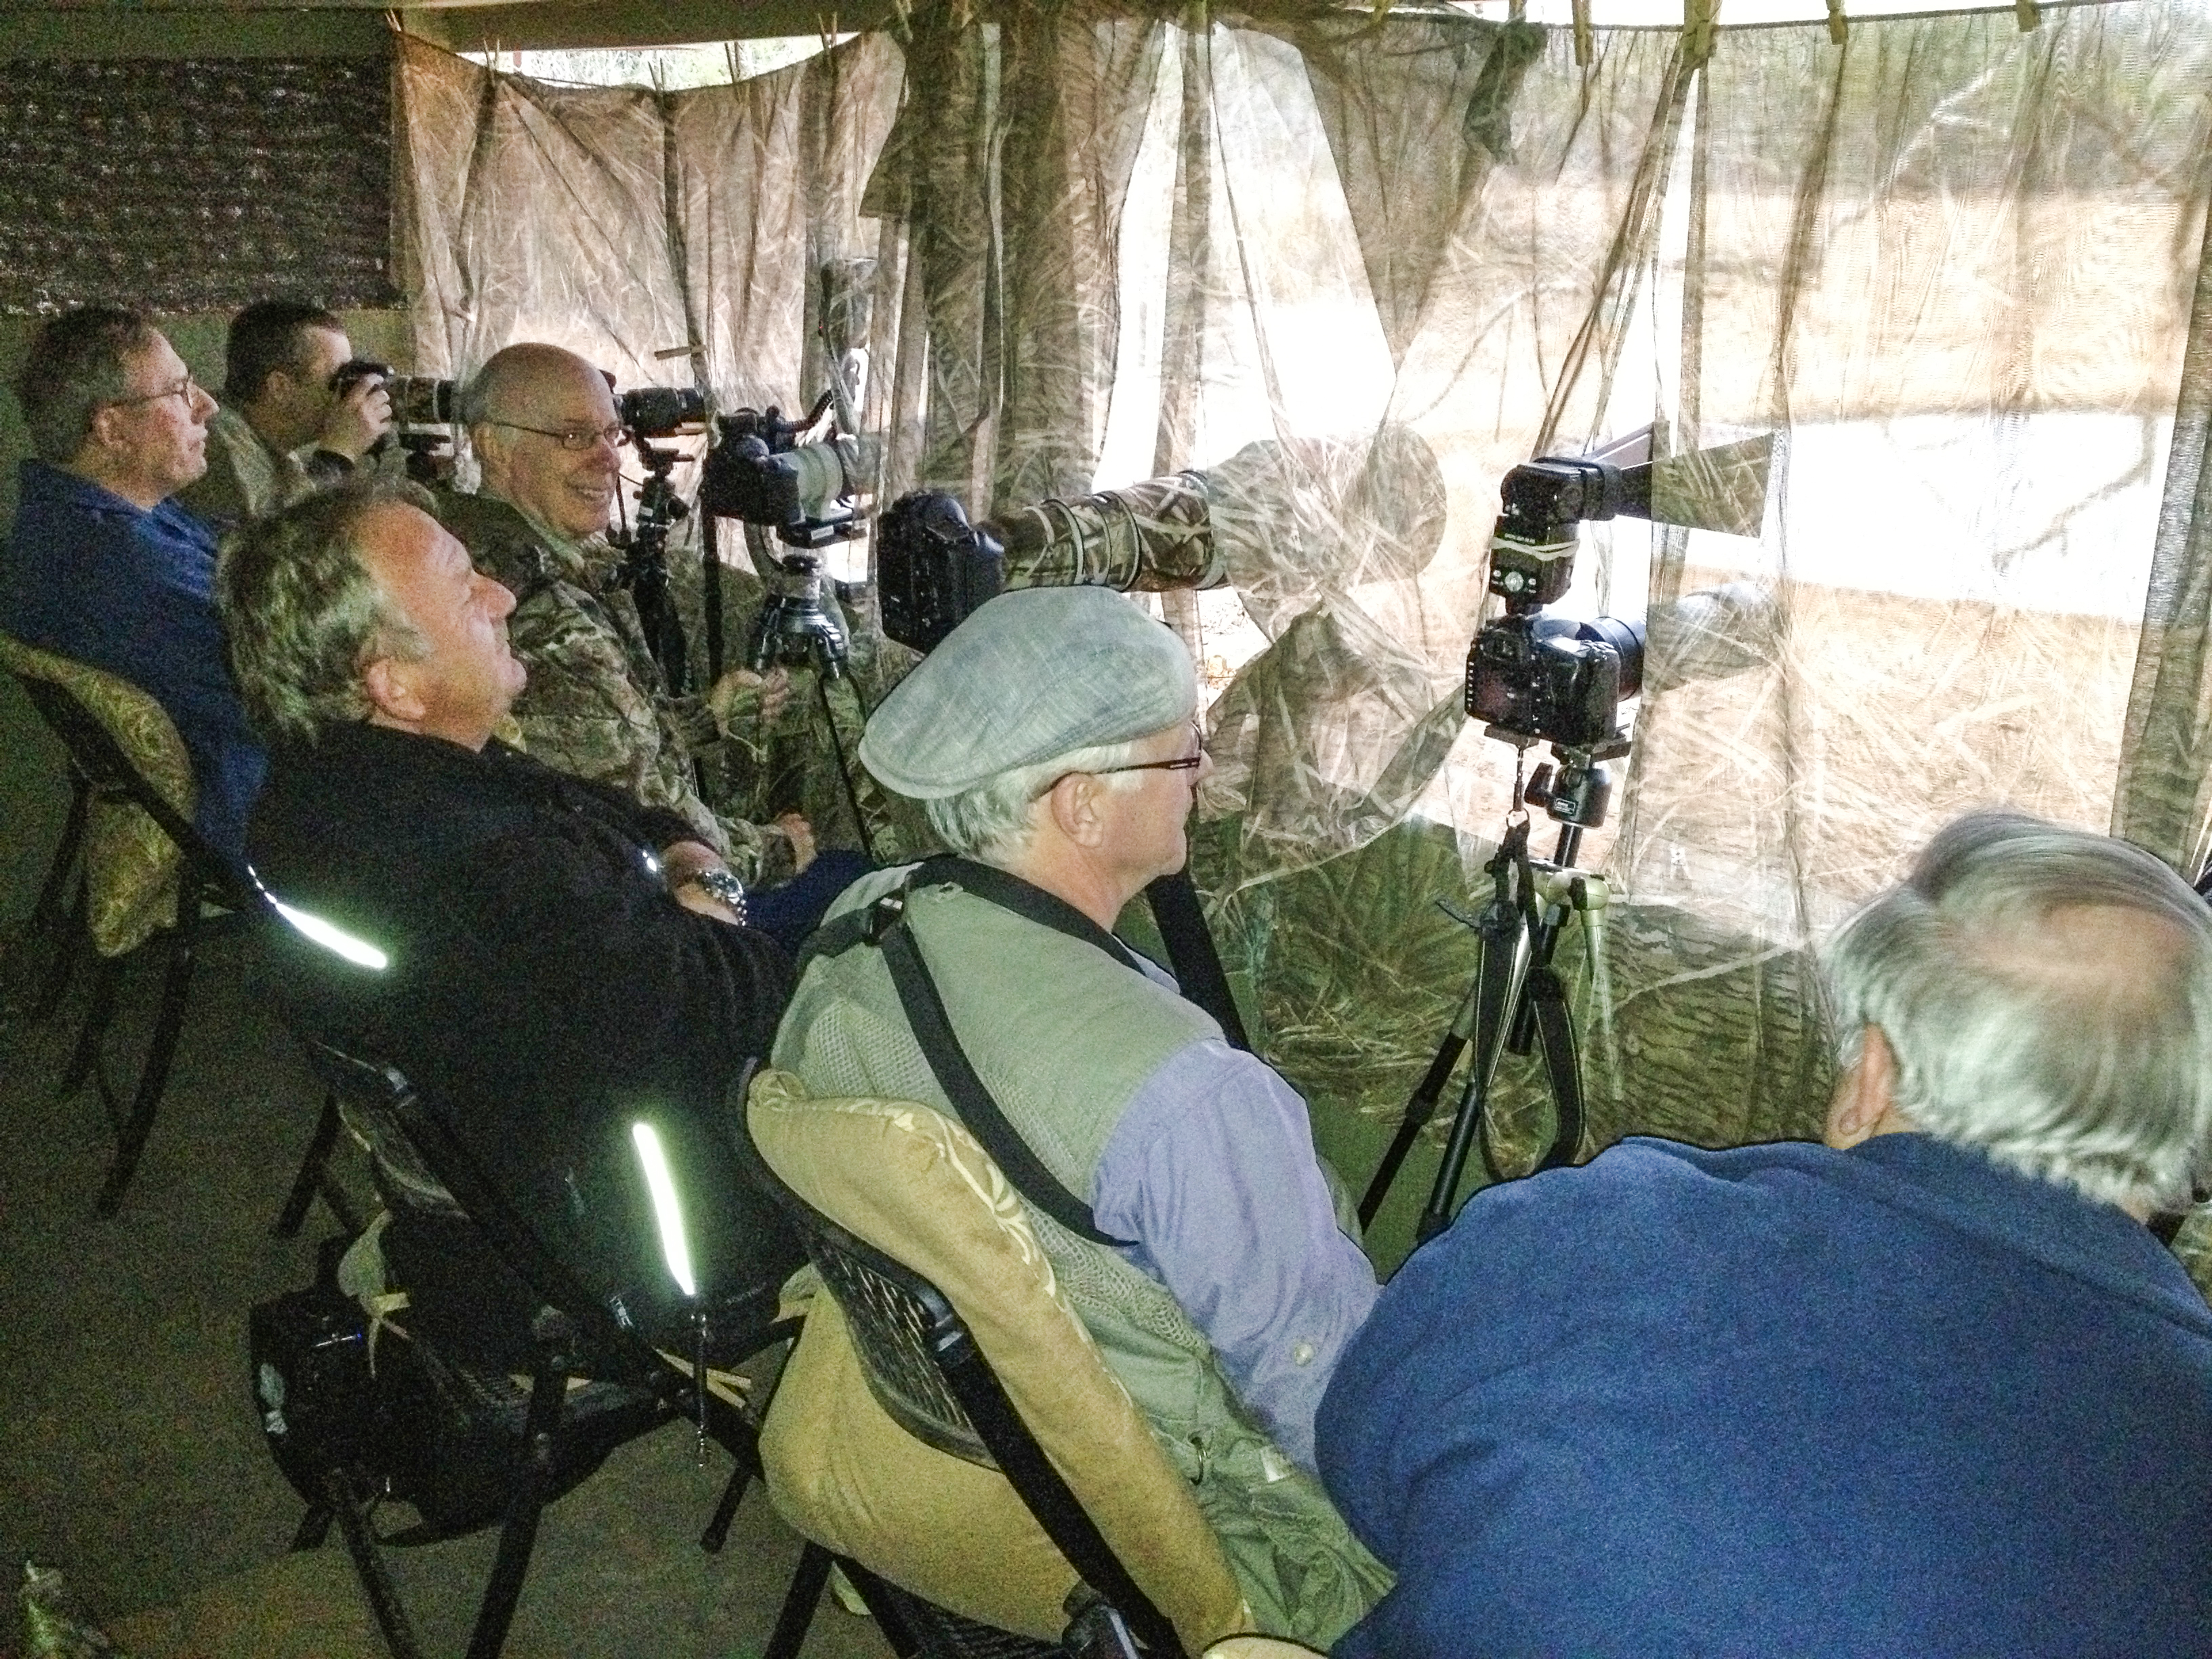
The interior of the blind above shows the type of camera, flash, and tripod set up a blind should be able to accommodate. The cord along the ceiling is used to attach camo netting with clothes pins.
–The netting will be pinned to a rope strung along the bottom front edge of the blind and along the top front edge. A popular option is to place a second rope along the top of the blind about 18 inches in from the front edge and use this to hang the camouflage netting. Note: The type of netting you use is important, as you want to hide the photographer from view while still allowing the photographer to see out without looking through the camera. It is suggested that you cut the netting into 18- to 36-inch-wide strips to hang in place around the camera. This allows mobility and options for the photographer.
Small side openings can be cut out of the side cloth and netting pinned to the edges. Openings 12 inches wide by 6 inches high work well. You may choose to cut only the bottom and side edges of the opening and then use clothes pins to pin the flap up and hold the camouflage netting in place.
Entrance. In most cases the photographer will get into the blind and wait for wildlife to arrive, as opposed to entering the blind to photograph wildlife that is already there. So the entrance will usually be from the front. However, if the setting makes this difficult or undesirable you may want to create an opening in the back or side by cutting a door in the cloth. Once inside, the photographer will pin the cloth door closed to prevent light from entering.
If it is possible to design your blind so that it can be entered without disturbing wildlife in front of the blind, do so. (This is generally difficult to do.) For a pit blind, you might want to have a hinged roof section and a ramp or steps that allow you to step down into the blind easily.
You might want to design at least one blind that has extra space, level surfaces and other adaptations to accommodate those with limited physical ability.
In any case, try to make access as easy as possible.
Floor. In general, a dirt floor with a piece of indoor/ outdoor carpet is all you need. If water on the ground is a concern, you can install a plastic or metal grate to elevate you above the ground a bit. Sections of heavy-duty plastic shelving (available from home improvement stores) placed on the ground work well. Wood floors are generally noisy and concrete is not safe for expensive equipment that might get dropped.
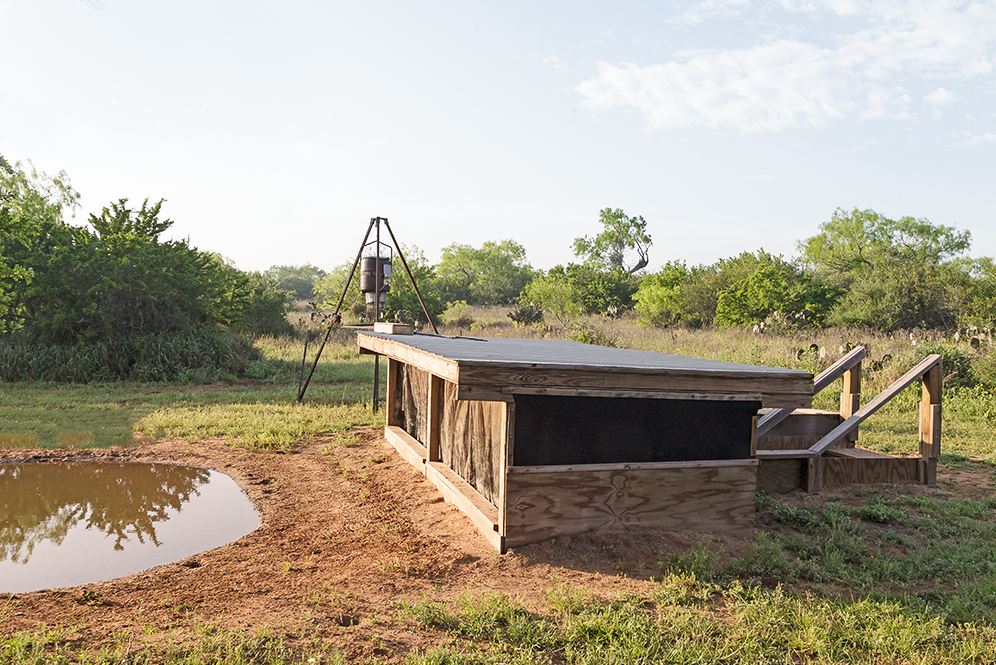
This permanent pit blind has a wood frame and wood walls to support the earth. The roof is plywood and the sides are a combination of nylon shade cloth and burlap. The front is left open for the photographer to cover with a combination of rough and fine mesh camo netting. Access is via a ramp and flap door in the back.
Other features
Sturdy, comfortable, quiet chairs (fabric or plastic) or stools with backs (for comfort) work best for seating. Metal chairs are noisy.
Keep a seal-able box in each blind for storing insect repellent, extra camouflage material for covering shooting ports, and clothes pins for holding camouflage material in place over the shooting windows. Also store a 1-gallon, seal-able container of bird feed photographers can use to lure birds to specific spots. All these materials must be stored in sealed containers to keep out animals.
Blind locations
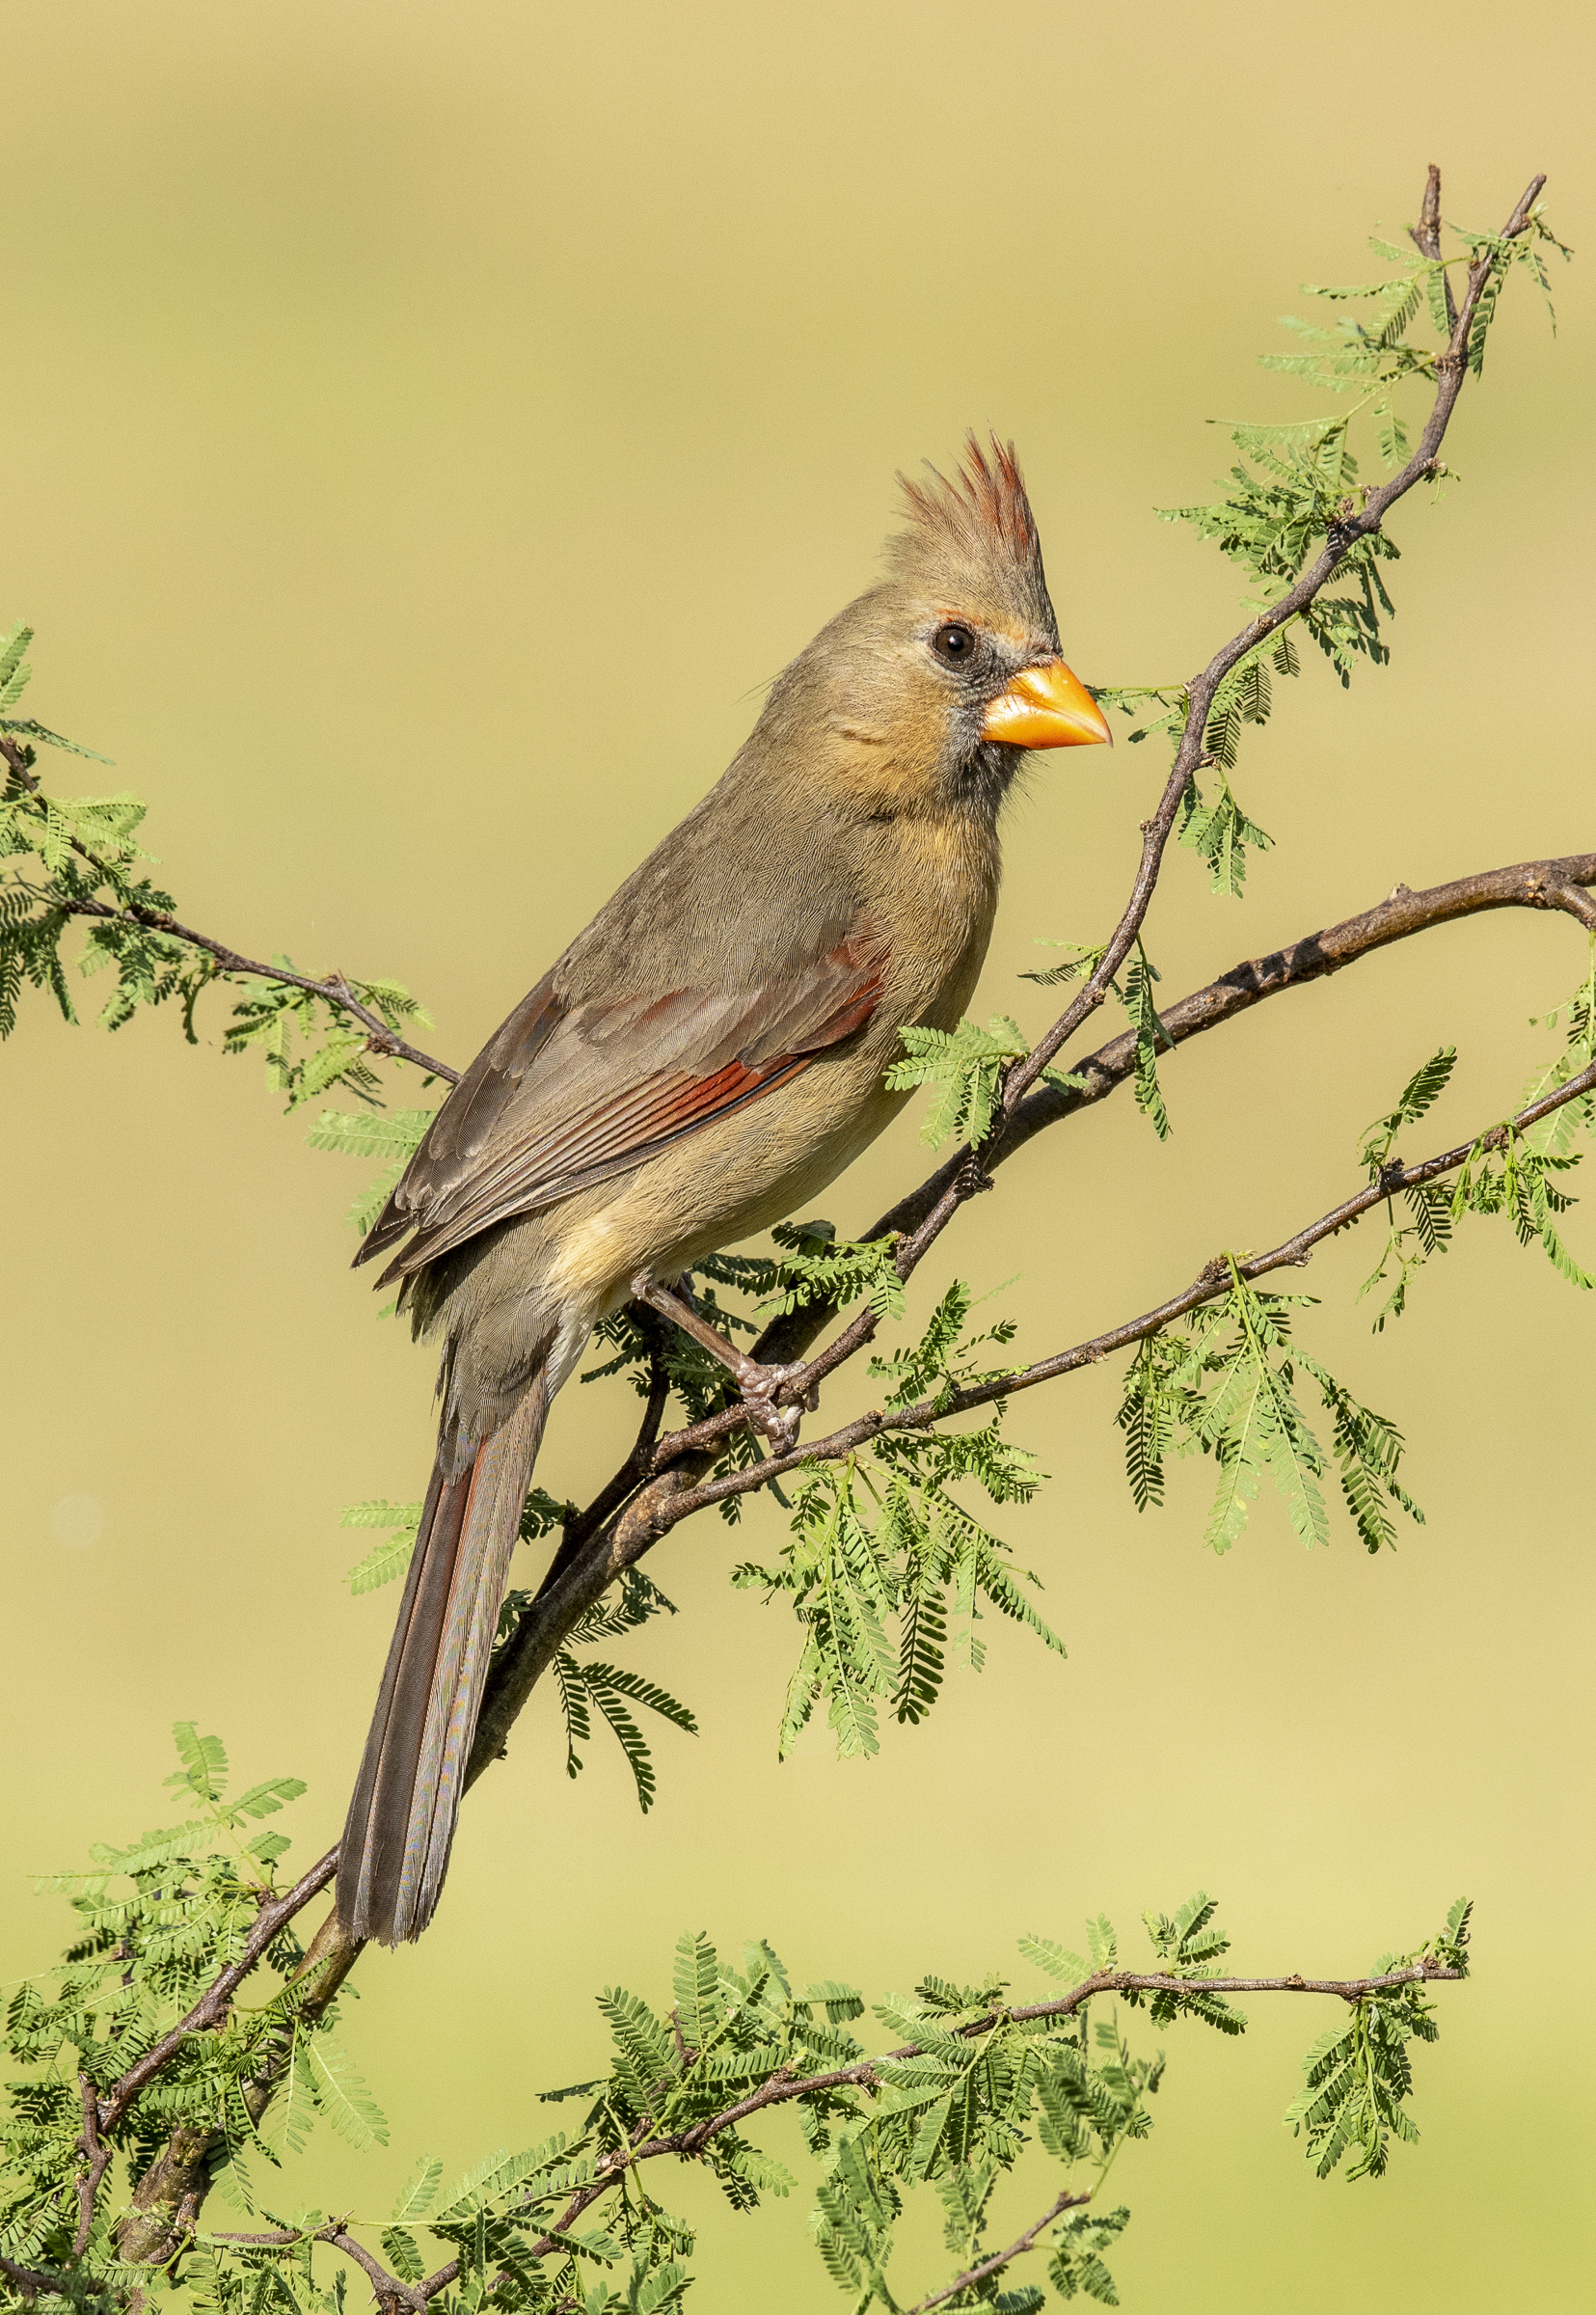
Obviously, you will want to place blinds where photographers are likely to see the most wildlife, and where they are likely to see any species for which your area is known. In South Texas, for example, birds such as green jays, kiskadees, least grebes, pauraques, groove-billed anis, golden-fronted woodpeckers, pyrrhuloxias, verdins and buff-bellied hummingbirds are a real draw, as are animals such as deer, javelinas, armadillos, Texas tortoises and diamondback rattlesnakes. A single blind location is rarely effective for photographing all kinds of wildlife; there should be separate blinds for birds and for big game animals.
The best time of day for photography, from a lighting standpoint, is early morning and late afternoon or early evening. Fortunately, these are the times of day when wildlife are most active. Remember that lighting and background are very important for photography, and a good wildlife location deep in a thicket will rarely have enough light for photography.
Some people may want to do night photography, however, in which case such locations would work.
Most photographers will be using 400- to 600- mm lenses and will want to be no more than 20 feet from small subjects such as birds and within 20 to 40 yards of mammals such as deer to get good shots.
Keep this in mind when placing blinds.
Place photo blinds at the southeast and southwest ends of the photo areas, such as ponds or water holes, for best lighting during peak photography times (early morning and early evening). Keep vegetation trimmed and orient the blind so that the sunlight will not be blocked from the target area. Place some large snags or stumps strategically in the pond where birds can perch and turtles can sun, making sure they are within range of the photo blinds. When trimming vegetation, remember that you do not want saw cuts to show up in photographs.
Some photographers might want blinds that extend out over water. And some photographers even use flotation devices covered by floating blinds to actually get out into the water and take pictures looking toward the shore.
Before you build the blind, you will want to confirm that the location is desirable and that the orientation of the blind is suitable for photography. You can do this by observing, measuring and marking the sun/shadow patterns at the location. (Of course, these will change during the year.) You want to make sure that the shade created by your blind does not shade the target area for photographing wildlife.
Testing the location and orientation of the blind also allows you to select the most desirable sites for water, perches and feeders.
If possible, install a ground-level blind and test it before creating a pit blind. You may find that it is more desirable to be able to move the blind throughout the year to adjust for light rather than to have a pit blind.
Enhancing the Blind Site Feeding
Feeding is used mainly to attract birds. Use a good mix of birdseed with sunflower seeds, millet, milo, etc., to attract the seed eaters such as doves, quail and sparrows. Also place a sliced orange at each blind each day to attract orioles, woodpeckers, green jays and many other birds. Another good feed is a mix of peanut butter, lard and corn meal. Placed in a hole on the back side of a perch it make for excellent attraction of woodpeckers and other seed eaters.

Put out only enough feed for one day; otherwise the raccoons and opossums will eat it at night. Don’t put feed on the ground because that attracts feral hogs and deer that will tear up the ground; grain on the ground also detracts from the natural appearance of a photo. Instead, hide seed or peanut butter paste in crevices and holes of logs where it doesn’t show and attach orange slices to the back sides of logs out of sight of the camera. The logs double as perches.
Standard hanging feeders can be used to attract birds where no one is able to visit the blind daily. Place the feeder close to the blind but somewhat to the side so that it will not show from most photographic angles.
Automatic timed feeders, or commercial deer feeders, also can be used. To attract birds, you will want to modify the feeder by placing a platform under the feeder and a collar around the spinning disk to cause the feed to fall straight down onto the platform.
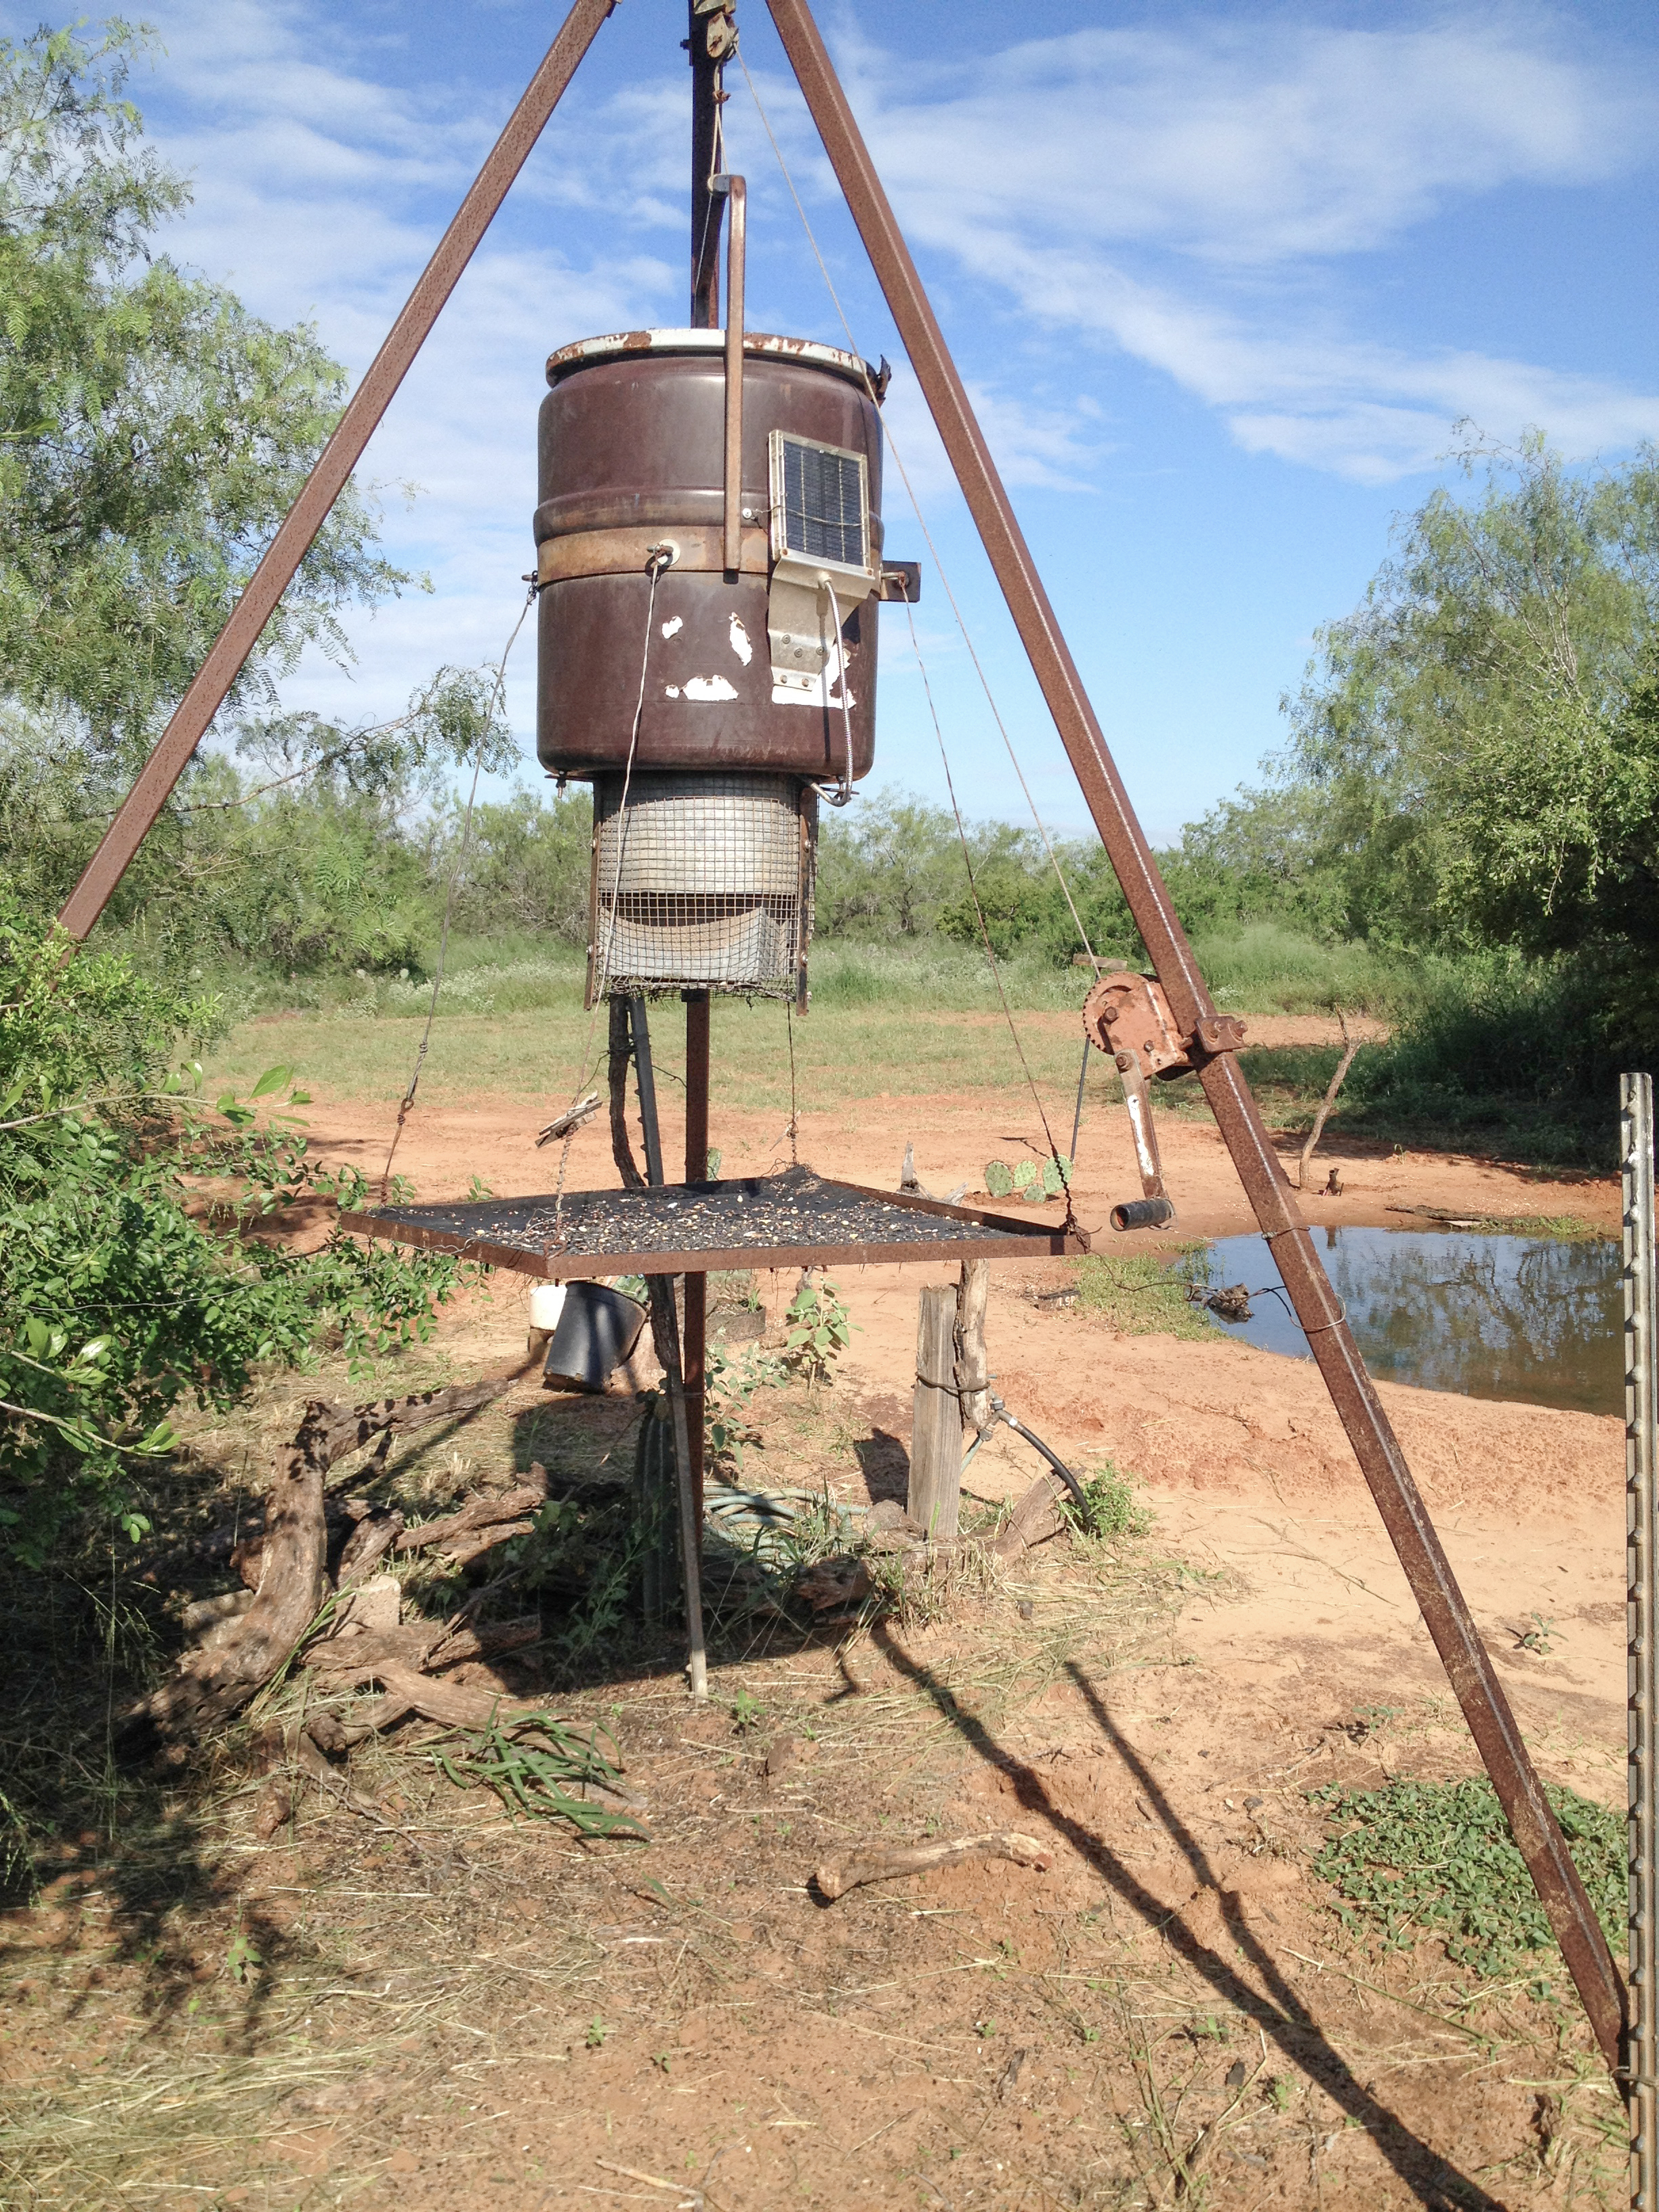
Be careful to set the timer so that only a small amount of feed is released. Also, be careful to set up the feeder so that raccoons cannot climb onto it. A problem with this type of feeder is that it is hard to avoid having it show in photographs, so plan its use carefully. It may be possible to use a small bucket with a timed feeder and hang it in such a way that it can be moved when photographers are actually in the blind.
Whether you are trying to attract big game or birds, feeding at the same time every day will create some changes in animal behavior and increase animal activity at “feeding time.” For example, feeding may cause nest predators such as raccoons to use the site more, or even increase in population if lots of feed and water are available throughout the year.
Water features
Water is a fantastic attraction for wildlife, so the best location for blinds is near ponds and water holes. If there is no natural water feature available, a very small “water hole” (even one as small as 3 feet in diameter) can be created by simply placing a plastic liner in the ground and filling it with water. Adding a drip system will help attract birds. With just a 5-gallon bucket, a faucet, drip tubing and a valve, you can set up a gravity-fed drip system that will work for hours. You simply need to elevate the bucket a couple feet above the surface of the water and hide the drip tube and equipment, so it does not show in photographs.
Of course, a permanent water source will attract many more animals than one that is only full of water occasionally. If you have a nearby water supply where you can connect piping or hose, you may want to do this. You can set up a constant slow-drip system with standard drip irrigation supplies. Or, you can install a rainwater collection system on the roof of the blind and use gravity to produce a slow drip.
Ponds and water holes used for photography should be kept at a constant water level, if possible, so that wildlife will use them regularly and predictably.
A constant water level allows aquatic vegetation to become established in and around the pond. Vegetation provides food and cover for invertebrates, fish, reptiles and amphibians. They, in turn, will attract ducks, grebes, wading birds, kingfishers, kiskadees and large reptiles such as indigo snakes. Aquatic plants filter water to make it clear and photogenic and they are used as nest material by grebes.
Create gently sloping sides in the pond (less than a 30-degree angle) so birds and animals can wade into the water to hunt, fish or bathe. If the water level fluctuates, gently sloping sides allow constant access to the water.
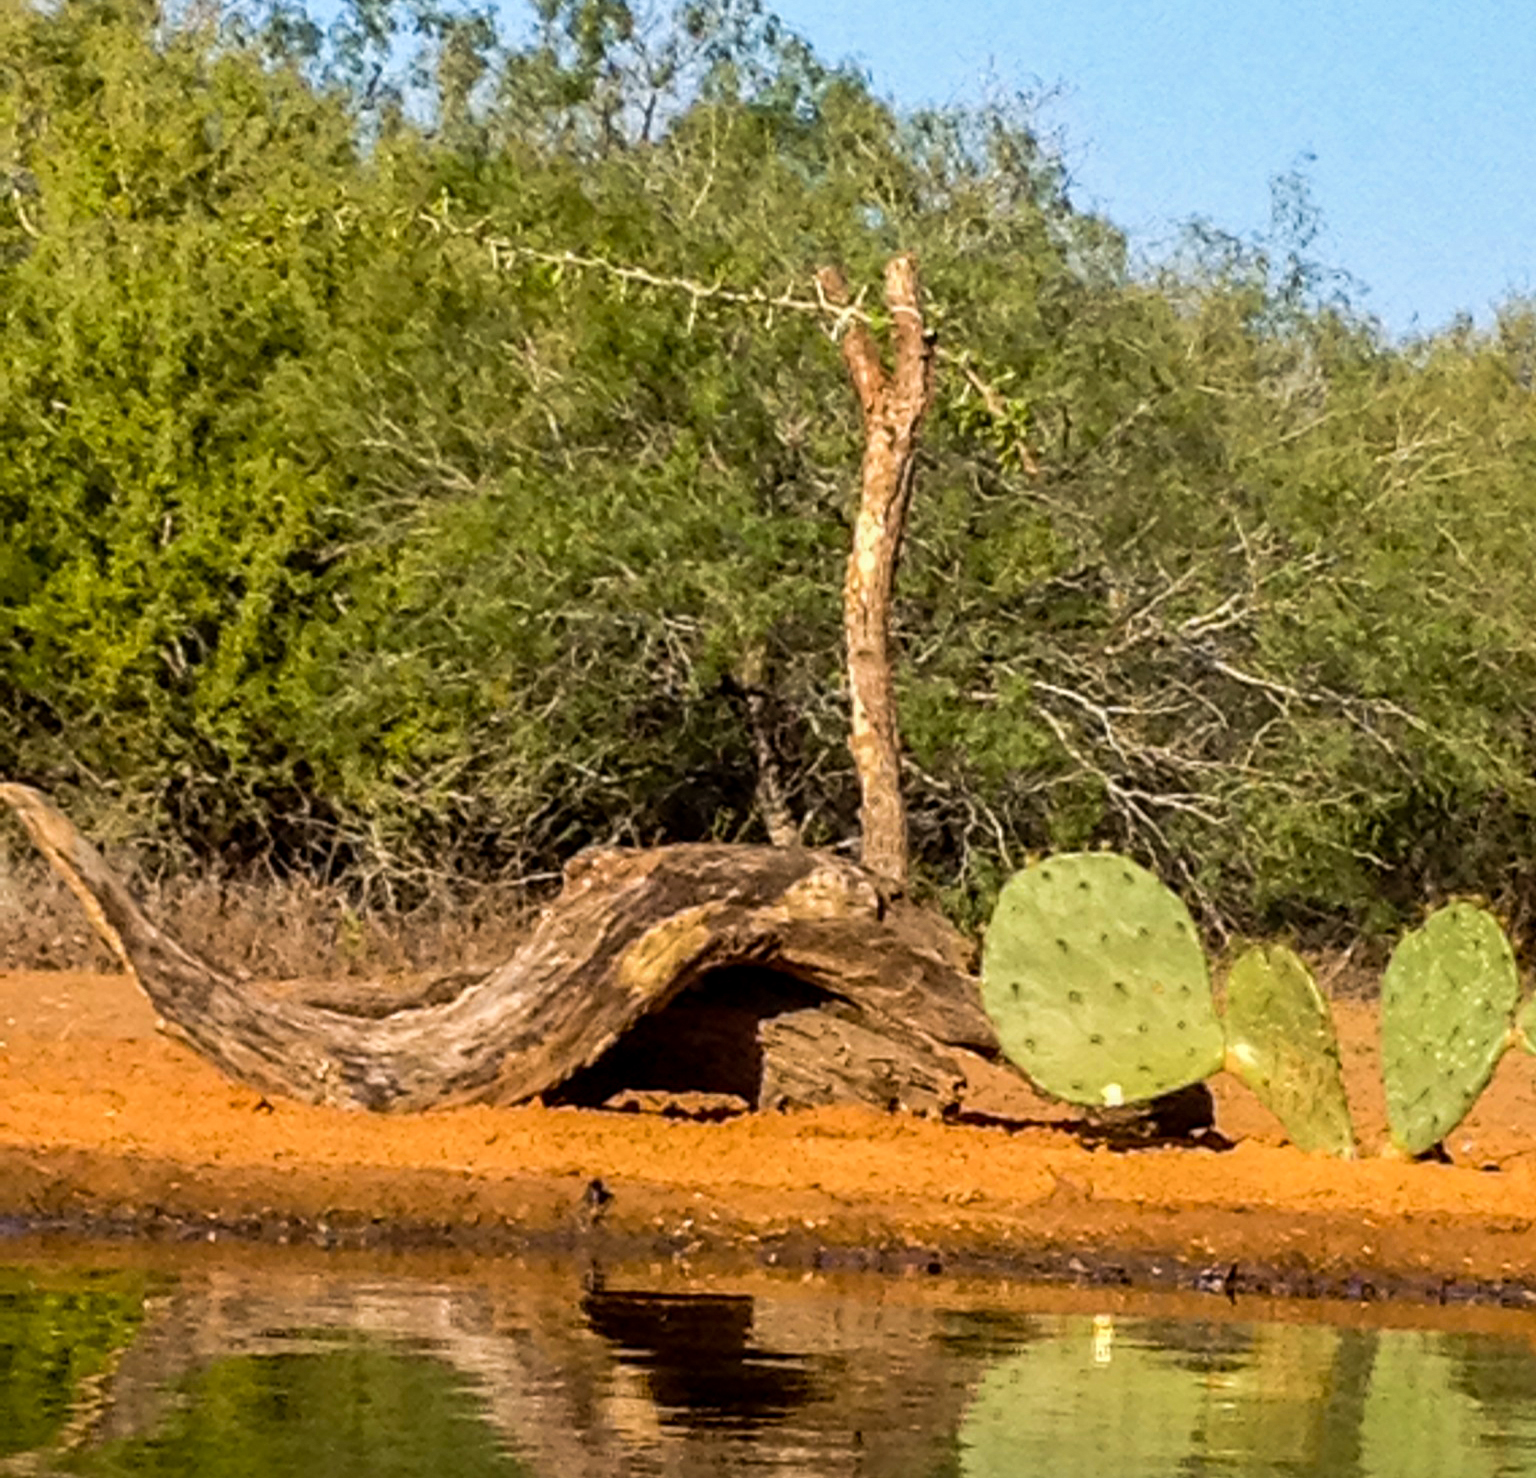
A shallow pond with a section or two of deeper water (4 feet or more) often has a greater variety of wildlife. Small fish can hide in the deep holes where it stays a bit cooler. Placing some structures such as logs or rocks in the deeper holes gives fish and frogs places to hide.
Perches and props
Photographers usually want the most natural looking site possible, so hide any man made objects.
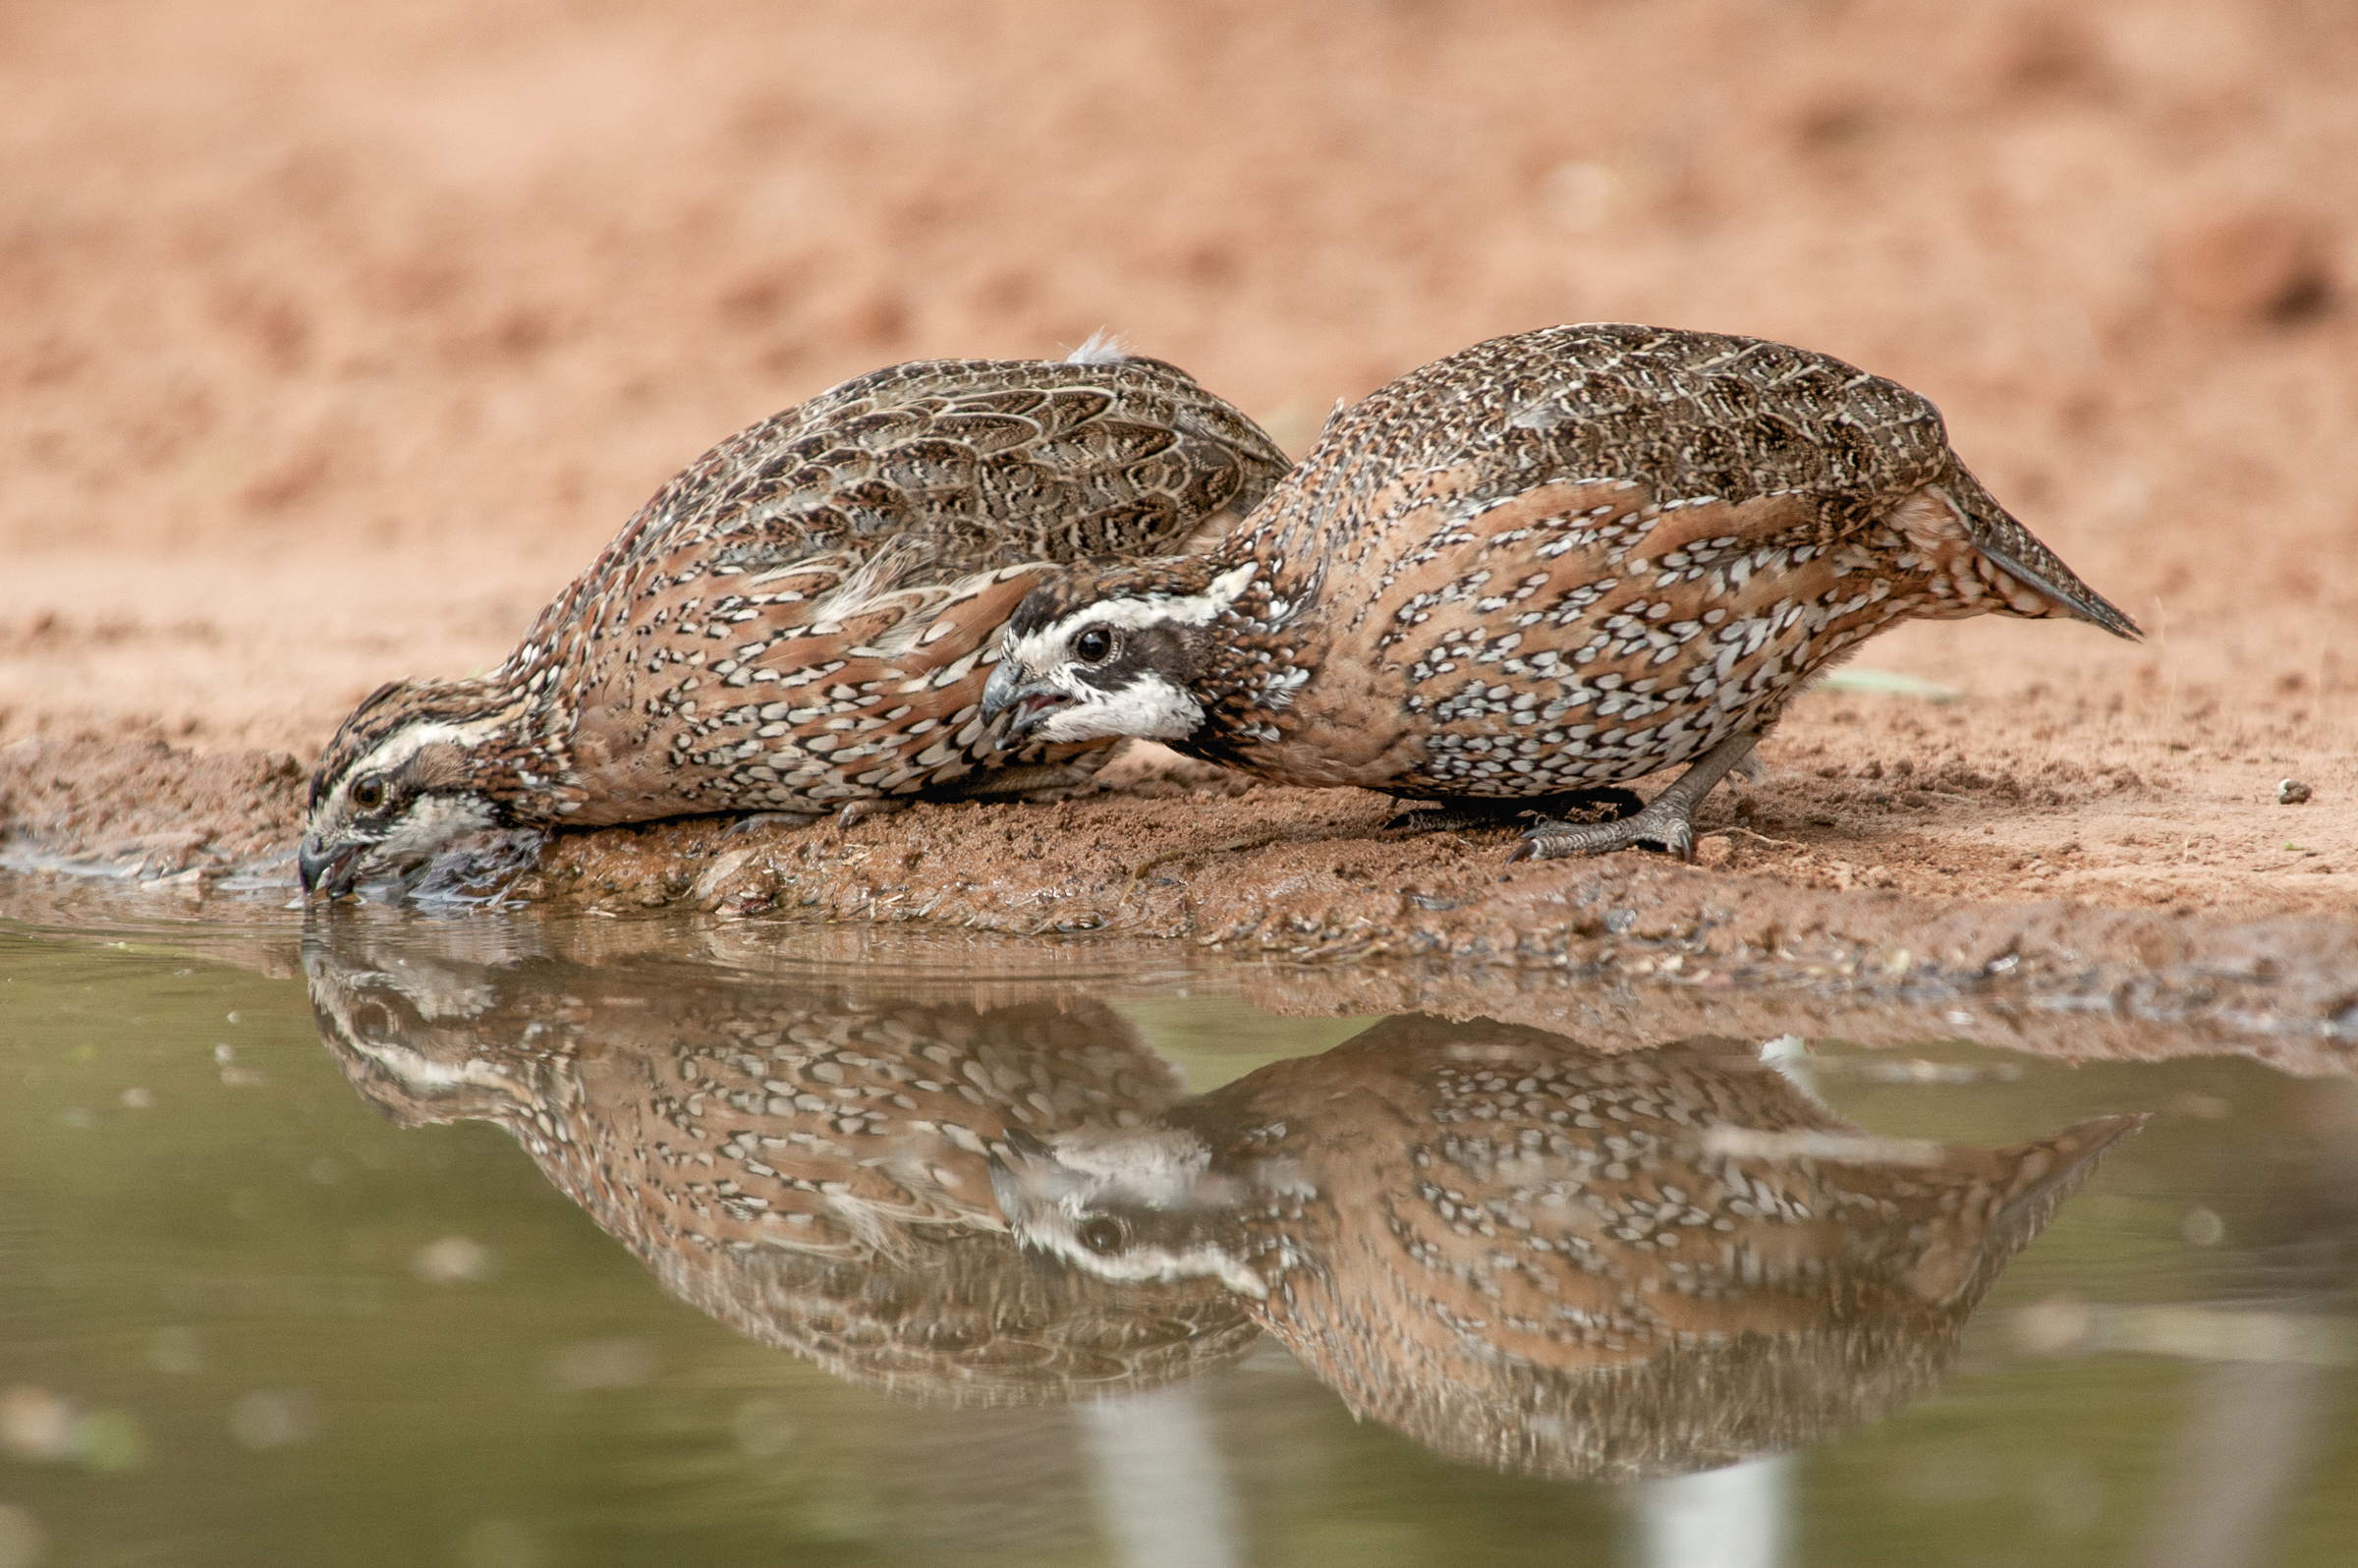
Don’t use perches with sawed-off limbs unless you can hide the sawed areas. Don’t leave float valves showing in watering tanks. Arrange feeders so they can be hidden or are out of the picture. Use hollow logs as temporary feeders so birds will perch on This log has been strategically placed to conceal a hose that supplies a water drip.

This water feature is a round, metal water trough sunk level with the surface of the ground. It is kept full with a water pipe and a float control valve. This feature does not have sloping sides, but it still provides access for most wildlife species.
them and look natural (the food can be hidden in the hollow of the log). While some man made objects may be visible from the blind, you want the locations where wildlife will be to look natural.
Sometimes a log, branch or rock is placed in the photo area to enhance photos or get animals to stop in a particular spot. If you do this, be sure the object won’t hide animals, block light, or clutter the photo area.
Protecting the blind
You should consider fencing out wild hogs and cows from the blind sites. Hogs and cows wallow up the water holes, knock down feeders, perches and blinds, and eat up the feed. When cows or hogs are around, all other wildlife often evacuates. Build the fence far enough away that it cannot possibly be seen or photographed. An electric fence may be the most effective. A car battery and solar panel system can be purchased at most ranch and feed stores.
It is a good idea to have separate sites for photographing birds and mammals so that mammals don’t tear up the bird photography sites. That way, if someone wants to photograph wild hogs and other mammals, special blinds will be set up for that purpose.
Copyright © 2023 Brian Loflin
All rights reserved.
