
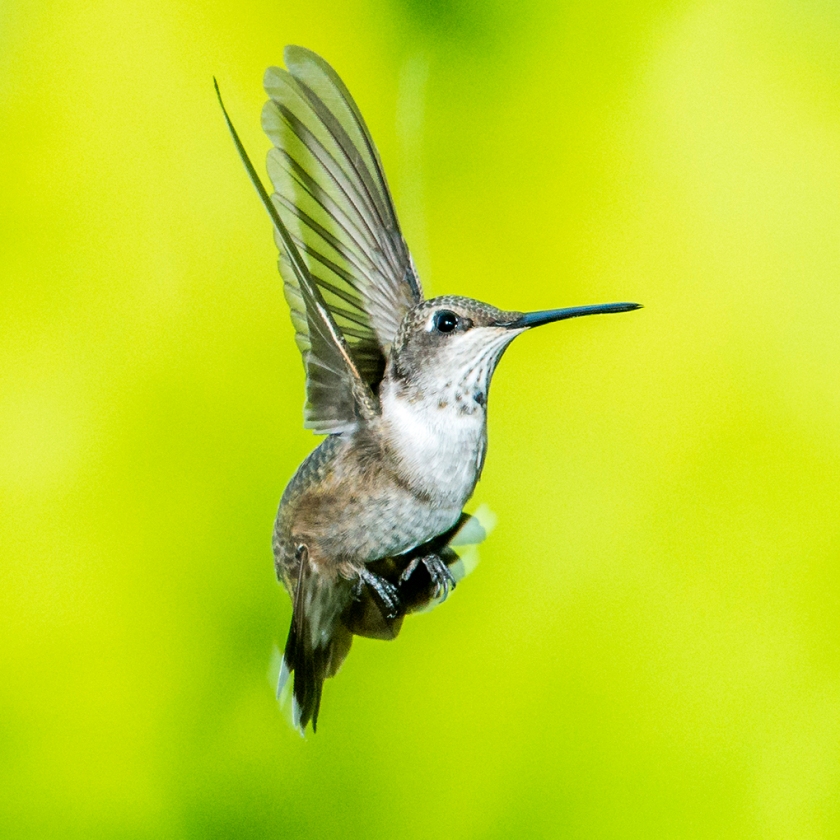
Capturing the inflight antics of hummingbirds, like this Black-chinned female, poses a number of challenges. We have to think about getting them where we want them to be, to be in focus, to have a good exposure, and to be sharp with wing feathers rendered in fine detail.
With today’s digital cameras, automatic technology makes some of this possible. But to get truly refined in-flight images of these little jewels, requires a bit more than camera and high shutter speeds alone. So multiple off-camera, electronic flashes is the only way to go.
To get the flying hummer where we want it, requires placing a feeder with one feeding port in the shade. Shade is important because we need the high speed capability of the off-camera flashes to work for us to stop the motion and wing beat of the hummers. If the set is placed in the sun, most flashes don’t have the power at high speed to compete with the sun for proper exposure.
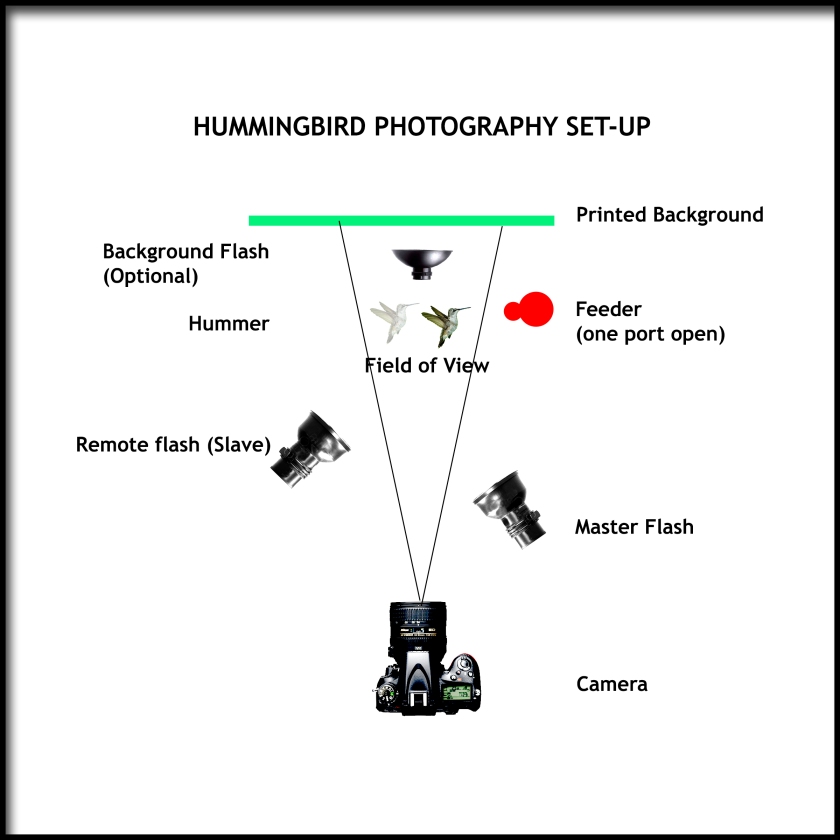
A diagram of my most frequent set-up is below:
Specifications include:
CAMERA:
Medium Telephoto Lens 70-200 mm
Manual Shooting Mode
Manual Focus – Focus on feeder tube-
ISO 800– (Adjust to achieve good shade exposure)
Shutter speed 1/250 sec (Or maximum flash sync speed for your camera)
Aperture F11- (Depending on adequate exposure in the shade)
FLASHES:
Three: 2 on Bird –about 2 feet in front of bird
1 on Background (Optional) — about 3 feet from background
Set at 45 degrees to bird
Zoom at 35mm
Flash Power- Manual 1/64 (Flash duration: 1/35,000 sec)
Trigger: Wired, Radio or Ettl / iTTl
BACKGROUND:
Out-of-focus photo of vegetation printed on matte paper about 30×40 inches
Mounted print on foam core board
Positioned on easel or stand about 3 feet behind bird (must remain in the shade)
ADJUST EXPOSURE:
Tweak flash-to-subject distance (preferred) or
Flash power in Manual Mode. (This changes flash duration)
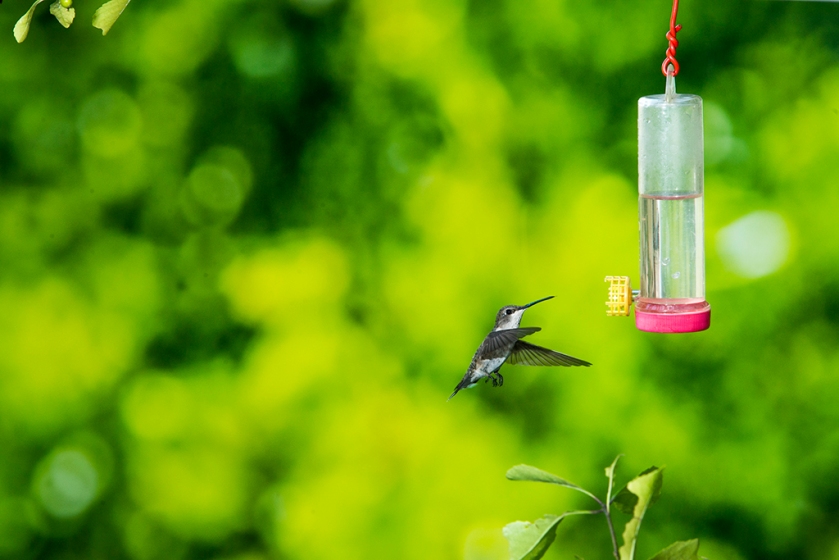
Here is a photo of the actual set-up:

The real key to this method is to let the electronic flash do the work for you. They are designed to produce crisp, daylight-white light, and at a very fast flash duration. Today’s Speedlights can produce a flash duration as short as 1/40,000 second.
But that speed is not to be achieved at full power. That full-power flash duration may be as long as 1/900 second, much longer. The short flash duration therefore, comes at a trade-off of output light intensity (or exposure, if you wish). Therefore we must be in the shade to overpower the sun. Two flashes on the bird provides additional exposure for increased apertures and better Depth of Field. Place the flashes on stands and synchronize them with the camera using cables, radios or IR triggers or the flash eTTL / iTTl technology. The flash sync does not need to be TTL as everything is in manual mode. The light intensity at the bird may be controlled by simply changing the flash-to-subject distance.
Once the feeder is set up and hummingbirds are using it frequently, it’s time to bring in the other equipment, including camera, flashes on their stands, and the background. It may take a few minutes for the birds to become settled down with all this around, but my experience has showed it is not very long.
When feeder, camera and background are in place, the camera needs to be focused on the feeder port in manual focus mode. The aperture will provide sufficient Depth of Field to assure the bird is sharply focused. As things are moving around, especially in a breeze, auto-focus tends to continuously hunt for a target. The picture you are trying to achieve, depending on lens focal length is like the one below. As the hummer sips, it will back away and then return to the feeder. When it backs away is the opportune moment to shoot.
Finally, the last thing to do is process the image. I shoot in RAW, so I can achieve excellent white balance and tone values in blacks, whites, shadows, highlights and mid-tones. Adobe Camera Raw is the perfect solution for the processing. Other software packages are available including, Lightroom, and On1. After processing, a final crop will yield excellent compositions.
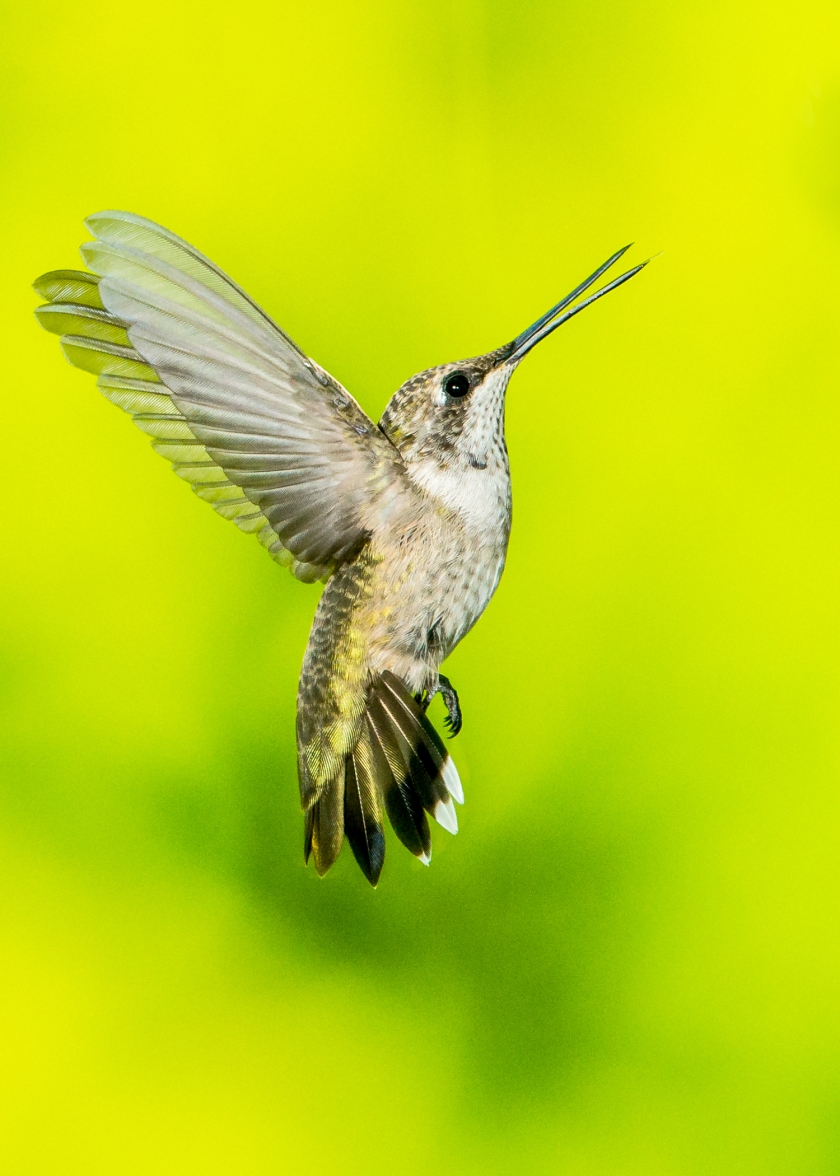
Later, as your success rate increases, the set may be fine-tuned by the addition of a couple of strategically-placed flowers and greenery to hide the feeder and to provide a framing device for the composition. In addition, the hummers may enjoy actually feeding from several species of tubular flowers with a bit of sugar-water mix in the flower throats. Watch the vegetation the hummers actually use and select some blossoms and greenery for a natural set-up. Then get your finger on the trigger and enjoy!
Copyright © 2017 Brian Loflin. All rights reserved.

Simply stunning photos. I attempted to capture our hummers, but dabble with photography and paint more. I’m curious, does the flash scare the hummers? Also, wouldn’t the sun substitute for the flash or are you going for eliminating shadows?
Tina, Thanks for your comments.
The flash does not seem to frighten the hummingbirds at all. They may on occasion look toward the flash to check it out.
The sun cannot sub for the flash because the flash is being used as a high speed, action-stopping component, actually in effect, replacing the camera’s shutter speed.
The speed of the burst from the flash is in excess of 1/30,000 second. Camera shutters don’t achieve that speed and so are far too slow to stop the beat of the wings.